Mastering unknown corners isn’t about memorizing rules like “slow in, fast out,” but about learning to read the road’s geometry in real-time and translating that information into precise, calm control inputs.
- The speed and movement of the vanishing point directly tell you if a corner is opening, tightening, or constant, allowing you to adjust your speed proactively.
- Your motorcycle turns exactly where you look. Overcoming target fixation by consciously focusing on your desired exit path is a non-negotiable survival skill.
Recommendation: Focus first on mastering visual discipline. Your hands and feet will follow your eyes. Practice looking through the corner to your exit point, and your inputs will become smoother and more confident.
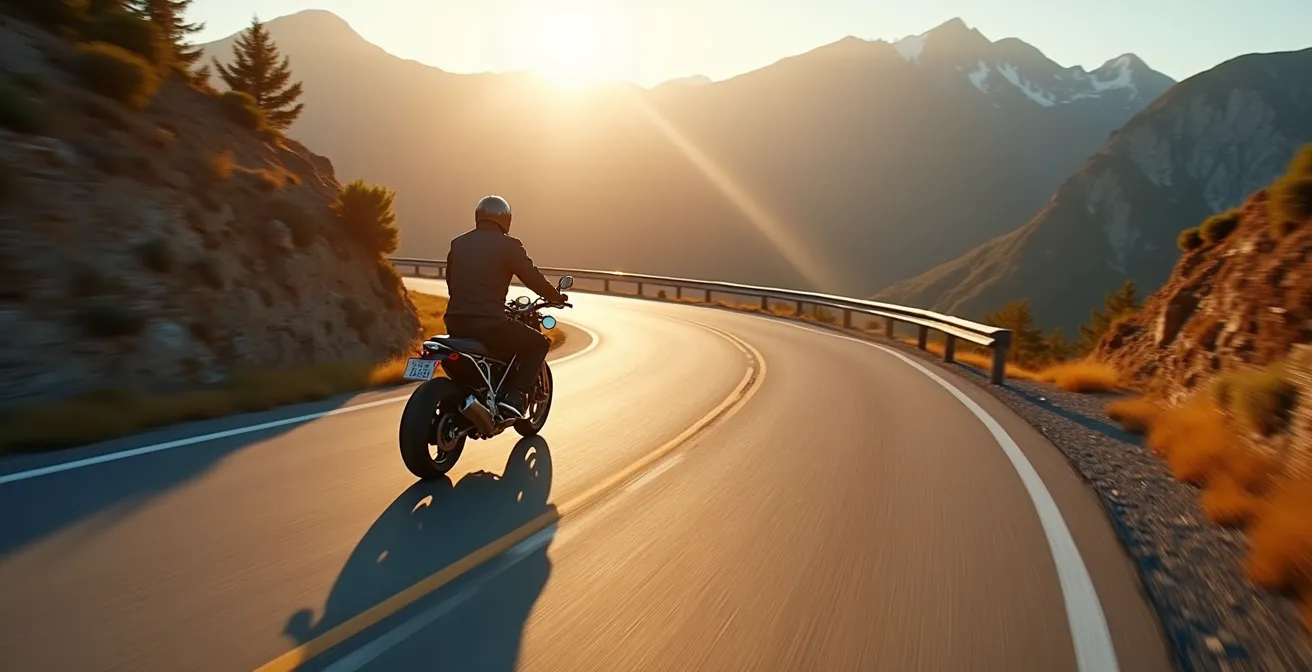
That familiar knot of anxiety tightens in your stomach as you approach a blind curve on an unfamiliar country road. What’s around that bend? Is it a gentle sweeper or a decreasing-radius trap? Common advice tells you to “look where you want to go” or to be “smooth on the controls,” but these platitudes often evaporate in a moment of real-world panic. You might be told to simply “use the vanishing point,” but few explain how to translate that abstract visual cue into a concrete physical action on the handlebars or throttle.
The truth is that cornering with confidence isn’t about bravery or aggression; it’s about developing a system. It’s about transforming what your eyes see into a calm, predictable conversation between you and your motorcycle. The fear of the unknown diminishes when you have a reliable method for gathering information and a set of deliberate, practiced inputs to respond with. This isn’t magic; it’s the application of visual physics and refined motor skills.
This guide moves beyond generic advice. We will break down the essential skills, from the foundational mechanics of steering to the psychological traps that can lead you astray. We will explore how to manage the motorcycle’s chassis, how to prepare for hazards, and why some common “upgrades” can actually hinder your control. The goal is to build a mental model that turns anxiety into active analysis, allowing you to flow with the road, not fight it.
To navigate this journey from apprehension to confidence, we will explore each critical component in a logical sequence. This article provides a structured path to understanding not just the ‘what’, but the ‘why’ behind advanced cornering techniques.
Summary: A Visual and Mechanical Guide to Mastering Unknown Corners
- Why Pushing the Handlebar Left Makes the Bike Go Left in a Curve?
- Which Gear Ratio to Choose for Tight Switchbacks to Avoid Stalling?
- The Visual Mistake That Draws You Into the Ditch Instead of the Exit
- When to Lower Your Tire Pressure for Better Grip on Twisty Roads?
- How to Apply Throttle Smoothly to Stabilize the Chassis Mid-Turn?
- Mid-Corner Gravel: How to Stand the Bike Up Safely Without Running Wide?
- The 200mm Tire Myth: Why Putting a Fat Tire on a Stock Rim Kills Handling?
- Gravel in the Corner: How to React Without Chopping the Throttle?
Why Pushing the Handlebar Left Makes the Bike Go Left in a Curve?
This is the most critical and counter-intuitive principle of motorcycle dynamics: counter-steering. At any speed above a walking pace, to initiate a lean and turn to the left, you must apply a gentle but firm push forward on the left handgrip. To turn right, you push the right handgrip. It feels wrong at first, but it is the only way a single-track vehicle can effectively initiate a turn. This action uses gyroscopic precession to cause the front wheel to steer briefly in the opposite direction, unbalancing the bike and initiating a lean into the corner.
Many riders do this unconsciously, but an anxious rider often reverts to their instinct to “turn the bars like a car,” which has the opposite effect at speed and can lead to running wide. Building a conscious, deliberate muscle memory for counter-steering is the foundation of all confident cornering. It’s a panic override system; when you feel you’re going too fast or running wide, the correct response is not to tense up, but to push more on the inside bar to increase your lean angle and tighten your line. This requires trust in the physics and in your tires.
Your Action Plan: 4-Step Counter-Steering Drill to Override Panic Instincts
- Practice push-steering drills in an empty parking lot at 15-20 mph to build muscle memory. Focus on making the bike weave with small, deliberate pushes.
- Use the ‘push right to go right, push left to go left’ mantra repeatedly during practice sessions, as detailed in guides for building pro-level habits.
- Gradually increase speed to 30-40 mph while maintaining those same deliberate handlebar inputs to feel how the bike responds more quickly.
- Introduce obstacle avoidance scenarios using cones to simulate emergency situations, forcing you to use a firm push-steer to change direction rapidly.
Which Gear Ratio to Choose for Tight Switchbacks to Avoid Stalling?
Selecting the right gear before you enter a tight corner is crucial for maintaining chassis stability. Being in too high a gear means the engine will be bogging down, unable to provide the smooth drive needed to settle the suspension. Too low a gear, and the bike becomes jerky and overly sensitive to throttle inputs. The goal is to be in a gear that allows the engine to spin comfortably in the lower third of its powerband, providing enough torque to pull you smoothly through the turn without needing aggressive clutch work.
For a tight, uphill hairpin, this is often first gear. For a more open, faster switchback, it might be second or even third. The key is to get your braking and downshifting done while the bike is still upright, *before* you initiate your lean. A settled chassis is a predictable one. Trying to shift mid-corner is a recipe for upsetting the bike’s balance precisely when you need it most. The engine is a powerful tool for stabilization; a smooth, positive drive from the apex onward helps transfer weight to the rear, increasing traction and holding your line.
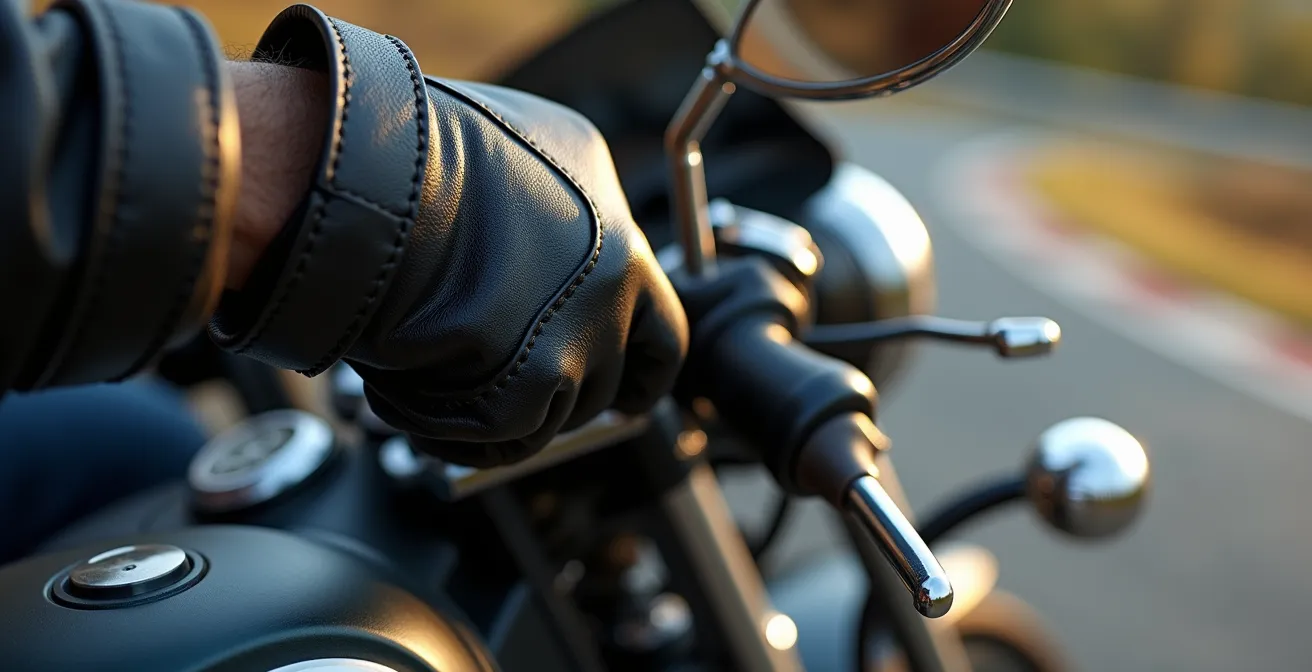
This macro photograph highlights the rider’s poised hand, ready for the crucial input needed to navigate the turn ahead with precision.
The table below, based on principles from advanced riding guides on corner speed, offers a general framework for gear selection in common switchback scenarios. Use it as a starting point and adapt it to your specific motorcycle’s power delivery.
| Corner Type | Recommended Gear | RPM Range | Benefits |
|---|---|---|---|
| Steep Hairpin (<15 mph) | 1st Gear | 3000-4000 | Maximum torque, clutch control available |
| Moderate Switchback (20-25 mph) | 2nd Gear | 3500-5000 | Smooth power delivery, engine braking |
| Fast Sweeper (30-35 mph) | 3rd Gear | 4000-5500 | Stability, minimal chassis upset |
The Visual Mistake That Draws You Into the Ditch Instead of the Exit
Your motorcycle goes where you look. This is not a metaphor; it is a neurological and physical certainty. The most dangerous visual mistake a rider can make is target fixation. This happens when your brain locks onto a perceived threat—the guardrail, an oncoming car, a patch of gravel—and you stare at it. Your body and the motorcycle will follow your gaze with unwavering loyalty, even if it guides you directly into the object of your fear.
Target fixation can kill you, or you can turn it into something that will save you.
– Experienced Rider, Riding in the Zone – Visual Control Techniques
Breaking this spell is non-negotiable for survival. The solution is to turn target fixation into a positive tool: consciously and aggressively fixate on your safe path. In a corner, this means keeping your chin up and your eyes locked onto the corner’s exit, or as far down the road as you can see. Your peripheral vision is more than capable of monitoring hazards while your central vision guides the bike along the desired arc. This is the essence of the visual-to-physical translation; you provide the target, and your body’s subconscious inputs will steer the bike to it.
Your Action Plan: Three-Step Mental Drill to Break Target Fixation
- Chin Up: The moment you feel fear or fixation, physically lift your chin. This naturally forces your gaze further up and away from the immediate threat in front of your wheel.
- Eyes Sweep: Consciously scan from your immediate path, through the apex, and lock your eyes onto the corner exit or the furthest visible point of clean pavement. Make it a smooth, deliberate sweep.
- Push Bar: As soon as your eyes are on the exit, immediately apply positive counter-steering input toward that visual target. Push the bar on the side you want to go, reinforcing the connection between vision and steering.
When to Lower Your Tire Pressure for Better Grip on Twisty Roads?
The simple answer for street riding is: you don’t. This is one of the most persistent and dangerous myths in motorcycling. While track riders often lower tire pressures to compensate for the extreme heat generated during racing, doing so on the street is counterproductive and unsafe. Your motorcycle’s tires are engineered to perform optimally at the manufacturer’s recommended pressures for road use. This pressure allows the tire to maintain its designed profile, which is critical for handling.
Lowering the pressure causes the tire carcass to flex excessively. This has several negative effects. First, it distorts the tire’s profile, creating a ‘flattened’ contact patch that makes the bike feel sluggish to turn in and less stable at lean. Second, it generates excessive heat, leading to accelerated wear and unpredictable grip characteristics. A tire that is too soft will feel vague and squirmy, completely destroying your confidence mid-corner. The feeling of the front “washing out” or the bike refusing to hold a line is often a symptom of improper pressure, not a lack of grip. According to advanced riding technique guides, 100% of professional riding instructors recommend maintaining manufacturer tire pressures for road use to ensure predictable handling and safety.
Your grip budget is maximized when the tire operates as designed. Trust the engineers. Before every ride, check your tire pressures with a quality gauge and set them to the specifications listed on your bike’s swingarm or in the owner’s manual. A predictable bike is a safe bike, and that predictability starts with correct tire pressure.
How to Apply Throttle Smoothly to Stabilize the Chassis Mid-Turn?
Throttle is not just an accelerator; it is a primary tool for stabilizing the motorcycle’s chassis, especially from the apex of a corner outwards. A closed throttle mid-turn causes the bike to pitch forward, loading the front suspension and reducing the contact patch of the rear tire. This can make the bike feel unstable and want to “fall” into the corner. Conversely, a smooth, steady, or slightly positive throttle application transfers weight to the rear, settles the suspension, and helps the bike maintain its intended line with grace.
The goal is to achieve “neutral throttle” as you tip the bike in, meaning just enough throttle to eliminate driveline lash and keep the chassis from being unsettled by engine braking. As you pass the apex and can see your exit, you begin to smoothly and progressively roll the throttle on. This isn’t a sudden twist; think of it as gently “squeezing” the throttle, dialing in drive as you simultaneously reduce your lean angle. This visual-to-physical translation—seeing the corner open up and responding with more throttle—is what creates a satisfying and secure exit.
Contrary to what you may have heard about never letting off the gas in a corner, you can roll off the throttle mid corner to make positional adjustments. DO NOT CHOP THE THROTTLE OFF, ROLL IT OFF. The difference is immense.
– Riders Corner NZ, Practical Guide to Vanishing Point Technique
This highlights a key point: control is about smoothness, not binary on/off actions. A gentle roll-off to tighten your line is a valid technique; a sudden chop of the throttle is a panic reaction that destabilizes the bike. Practice thinking of your throttle not as a switch, but as a rheostat for rear grip and chassis stability.
Mid-Corner Gravel: How to Stand the Bike Up Safely Without Running Wide?
Spotting a patch of gravel mid-corner is a moment that tests every ounce of a rider’s discipline. The panic instinct screams to chop the throttle and grab the brakes, both of which will almost certainly lead to a crash. Another incorrect instinct is to immediately try to stand the bike up. Doing so abruptly will cause the bike to run straight, right off the outside of the curve. The correct response requires calm, deliberate inputs and trusting your visual skills.
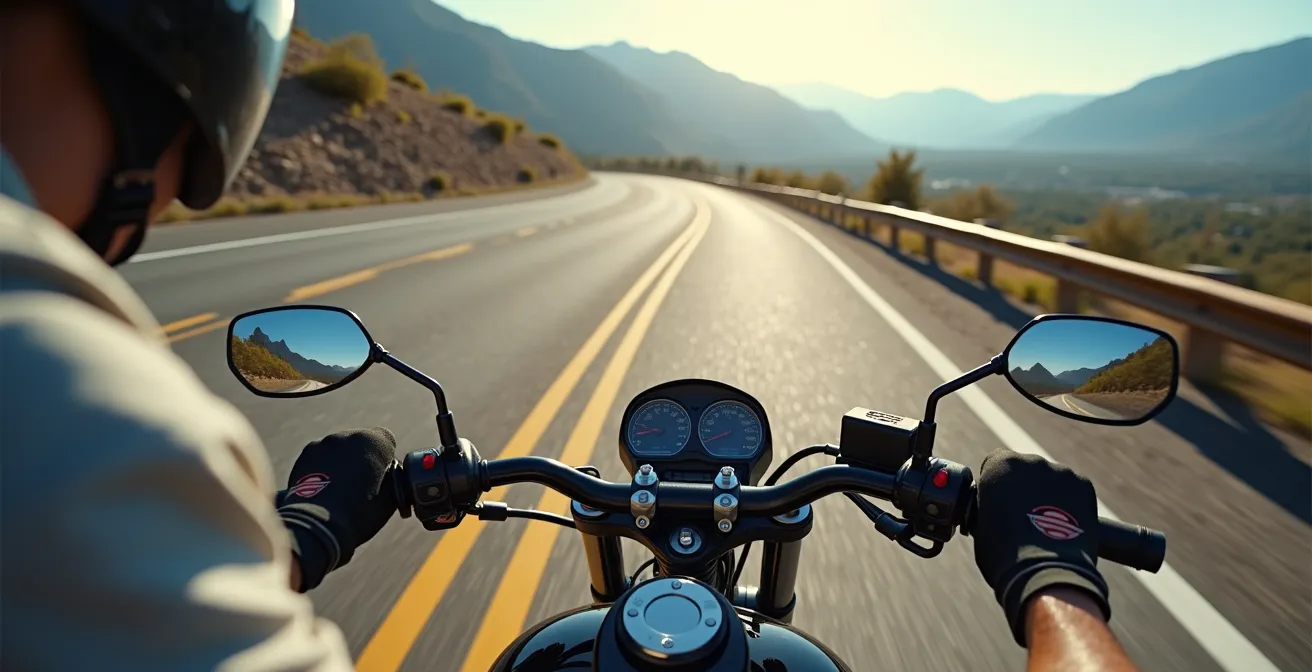
First, and most importantly, do not make any sudden changes. Do not chop the throttle. Do not touch the front brake. Keep your steering inputs minimal and your body relaxed. Your primary task is to immediately lift your chin and get your eyes onto the patch of clean pavement on the far side of the hazard. This is your new exit. By fixating on the safe path, you are telling your body where to guide the bike. The motorcycle is more capable of tracking across a small, loose patch than you think, provided you don’t upset its balance.
The rider’s point of view in this image captures that critical decision moment, where looking at the escape route through the gravel is the only path to safety.
If you have space and must adjust your line, the technique is a gentle, coordinated action. To stand the bike up slightly, apply a very light pressure on the *outside* handlebar (counter-steering away from the lean) while simultaneously, if possible, applying a whisper of rear brake. This combination will help the bike stand up in a more controlled manner than just a steering input alone, helping to tighten your line without running wide. The key is to be smooth and focus entirely on the clean pavement you’re aiming for.
The 200mm Tire Myth: Why Putting a Fat Tire on a Stock Rim Kills Handling?
The desire for a “fat” rear tire is a common aesthetic choice, but forcing an oversized tire onto a stock rim designed for a narrower size is a serious mistake that fundamentally compromises your motorcycle’s handling. It directly fights against all the cornering techniques we’ve discussed. A motorcycle turns by leaning, and the profile (or curvature) of its tires is meticulously designed to facilitate a smooth, progressive roll into a lean.
When you squeeze a wide 200mm tire onto a rim designed for a 180mm tire, you deform this profile. The tire’s shoulders are pinched inwards, creating a flatter, more triangular shape instead of a rounded one. This has disastrous effects on handling. The bike will resist being turned off-center, then suddenly “fall” into the corner once it gets past the flattened section. Mid-corner, it will feel unstable and require constant steering corrections to hold a line. You have effectively destroyed the tire’s ability to provide clear feedback and linear response. You are no longer in a smooth conversation with the road; you are in a constant fight with your own machine.
The following table illustrates the stark difference in handling characteristics. While the oversized tire might look aggressive when parked, its on-road behavior is anything but confidence-inspiring.
| Tire Setup | Turn-in Effort | Mid-Corner Stability | Contact Patch at Lean |
|---|---|---|---|
| Stock Width on Correct Rim | Light and Predictable | Stable and Confidence-Inspiring | Optimal Shape |
| Oversized on Stock Rim | Heavy with Sudden Fall-in | Unstable, Requires Corrections | Reduced and Deformed |
| Proper Width-to-Rim Match | Progressive and Linear | Planted and Predictable | Maximum Effective Area |
Your motorcycle’s handling is a carefully balanced system. Sticking to the tire sizes recommended by the manufacturer ensures that this system works as intended, allowing you to apply your riding skills with precision and confidence.
Key Takeaways
- Your primary steering input at speed is counter-steering. Push left to go left. This must become a practiced, non-negotiable reflex.
- Your eyes are your guidance system. Target fixation on hazards will lead you into them; disciplined focus on your exit path will guide you through.
- Chassis stability is everything. Smooth, deliberate throttle, brake, and gear-selection inputs made before the corner are the key to a settled and predictable motorcycle.
Gravel in the Corner: How to React Without Chopping the Throttle?
You’re committed to a corner, at lean, and suddenly you are in a patch of gravel. This is a different and more immediate crisis than seeing it ahead of time. The absolute worst reaction is to chop the throttle. Snapping the throttle shut causes immediate and dramatic engine braking, which heavily loads the front tire and destabilizes the entire chassis. On a low-traction surface like gravel, this sudden weight transfer is almost guaranteed to cause the front tire to lose grip, resulting in a low-side crash.
The correct, albeit counter-intuitive, response is to maintain a steady throttle. Your goal is to be as smooth as a stone skipping across water. Make no sudden inputs. Keep your gaze locked on the clean pavement at the exit of the gravel patch. Let the bike move and squirm a little underneath you; fighting these small movements will only make things worse. If you feel you absolutely must slow down, the technique is not to chop the throttle but to use a tool that adds stability.
Use the rear brake gently. You will not only decrease your speed, but the motorcycle will turn a bit around its rear wheel so to speak, so you will turn more into the corner. That’s exactly what you need. Mind that you don’t hit the rear brake hard in panic!
– LazyMotorbike.eu, Tips for Cornering on Your Motorcycle
This expert tip is invaluable. A gentle drag of the rear brake can help scrub speed without loading the front tire, and it has a mild stabilizing effect on the chassis. It’s a delicate input that requires practice, but it’s a far safer alternative than a panic reaction. In these moments, calm, practiced skill wins out over instinct every time.
Mastering these visual and physical skills is an ongoing process that transforms anxiety into active confidence. The road stops being a source of unknown threats and becomes a dynamic puzzle you have the tools to solve. The next step is to take these concepts from the screen to the pavement. Start by practicing individual skills like counter-steering and visual scanning in a safe, controlled environment like an empty parking lot before applying them on your favorite twisty roads. Your confidence will grow with every successfully navigated corner.