Helmet buffeting isn’t caused by wind hitting you, but by the low-pressure ‘vacuum’ pulling your head into turbulent air pockets.
- The goal is to manage airflow to create a stable, quiet pocket, not just block the wind with a larger screen.
- Every component, from your posture and gear to windscreens and luggage, contributes to your overall aerodynamic silhouette.
Recommendation: Instead of buying bigger equipment first, start by analyzing and adjusting how air flows around your existing setup to fill these negative pressure zones.
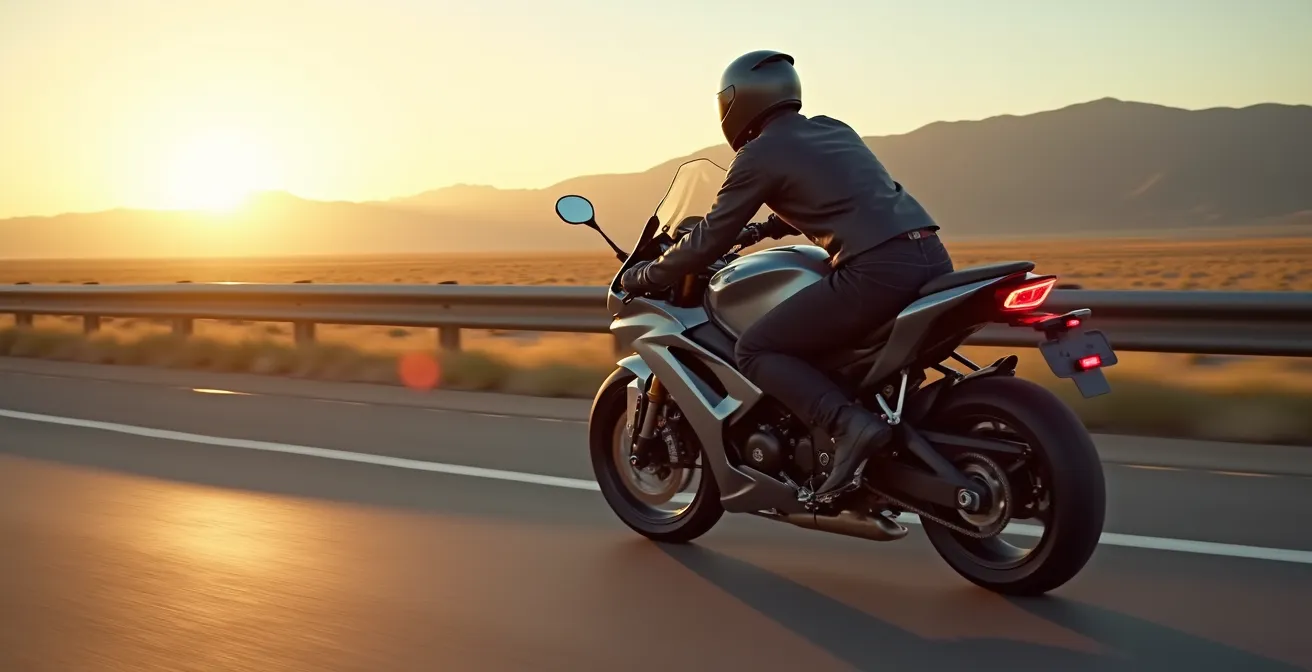
For any rider over six feet tall, the promise of the open highway can quickly devolve into a noisy, head-shaking battle against an invisible force. This violent helmet buffeting is more than an annoyance; it’s a source of significant neck strain, hearing fatigue, and a dangerous distraction. The common advice is often a frustrating cycle of buying taller windscreens or different helmets, treating the symptom rather than the root cause. Riders are told to block the wind, but this rarely solves the violent, unpredictable oscillations that define true buffeting.
The problem is that we’ve been thinking about it all wrong. As an aerodynamicist, I can tell you the issue isn’t the force of the wind hitting you head-on. The real culprit is the chaotic, turbulent air and the negative pressure ‘void’ that forms directly behind your windscreen and around your body. This low-pressure zone literally sucks your helmet into it, causing it to shake. True wind protection isn’t about building a bigger wall; it’s about intelligently managing the airflow to create a smooth, laminar stream that flows over and around you, eliminating that turbulent vacuum.
This guide will deconstruct the physics of buffeting from an aerodynamicist’s perspective. We will explore how your riding position, windscreen choice, luggage, and even your jacket create a complete aerodynamic system. By understanding how to manipulate airflow instead of just blocking it, you can transform your ride from a turbulent struggle into a stable, quiet experience, regardless of your height.
To navigate this complex topic, we will break down each element of the aerodynamic equation. This article provides a structured approach, from your own body’s influence to the final details of your gear, to help you systematically diagnose and solve buffeting.
Summary: A Tall Rider’s Aerodynamic Guide to Beating Buffeting
- Why Tucking In Saves You More Fuel Than Any Engine Modification?
- Double Bubble vs Stock Screen: Which Offers Better Airflow for Highway Cruising?
- The High-Speed Wobble: How Top Cases Affect Stability Above 70 mph?
- Do Aerodynamic Winglets Actually Provide Downforce at Legal Road Speeds?
- How Flapping Gear Increases Rider Fatigue on Long Rides?
- How to Add Wind Protection to Your Roadster Without Ruining Its Aesthetics?
- Pinlock Visors: How Does a Double Pane Lens Stop Fogging Instantly?
- ECE 22.06 vs DOT: Why the New European Standard is Safer for Your Head?
Why Tucking In Saves You More Fuel Than Any Engine Modification?
The most powerful aerodynamic tool you have is your own body. Tucking in isn’t just for racers; it’s a fundamental principle of managing your bike’s overall aerodynamic silhouette. When you sit upright, your chest and shoulders act like a parachute, creating immense drag. This not only slows you down and burns more fuel but also generates a large, turbulent wake behind you—a prime breeding ground for the negative pressure zone that causes buffeting. By tucking in, you reduce your frontal area and encourage the air to flow more smoothly over your helmet and back, rather than curling into a chaotic vortex.
For tall riders, a full “racing tuck” is often impractical and uncomfortable. The goal isn’t to lie on the tank, but to make strategic micro-adjustments. Slightly rolling your shoulders forward and tilting your head down can dramatically alter the airflow. This simple change can be enough to move the turbulent air pocket from your helmet’s level to above it. Ergonomic modifications like handlebar risers or adjustable rearsets are not just for comfort; they are tools to help you find and maintain this aerodynamically “quiet” position without strain, directly answering how to reduce buffeting through posture.
The key is to think of yourself and the motorcycle as a single, fluid shape. Your body isn’t just a passenger; it’s an active aerodynamic component. Finding the position where the airflow transitions from chaotic to smooth is the first and most cost-effective step in solving buffeting. Before spending a dime on new parts, experiment with your posture to find your personal quiet zone.
Your 5-Step Aerodynamic Self-Audit
- Find your baseline position: Sit naturally and note where the turbulent air hits your helmet and shoulders.
- Practice micro-adjustments: While riding safely, tilt your head down 10-15 degrees and roll your shoulders forward slightly, observing changes in noise and stability.
- Use the hand test: Safely use one hand to feel the air around the tank and screen area. Finding a spot where your hand feels “quiet” indicates where a deflector might work.
- Identify your personal ‘quiet zone’: Find the combination of head tilt and shoulder roll that noticeably decreases turbulence and makes the ride quieter. This is your target posture.
- Assess ergonomic needs: If holding this quiet zone posture causes strain, identify if handlebar risers or different footpegs would help you maintain it comfortably.
Double Bubble vs Stock Screen: Which Offers Better Airflow for Highway Cruising?
The windscreen is the most obvious tool for managing airflow, but its function is widely misunderstood. A taller screen is not always better. The goal isn’t to block wind but to redirect it into a laminar flow—a smooth, clean stream—that goes over your helmet. A poorly designed screen, regardless of its height, can create a sharp “edge” in the airflow, generating intense turbulence right at head level. This is where the design, specifically the curvature, becomes more important than sheer size.
A stock screen is often a compromise, designed for an average-sized rider at average speeds. For a tall rider, it often directs turbulent air right at the helmet. A “double bubble” screen features a more aggressive upward curve. This design creates a larger pocket of still air and is engineered to lift the main airflow higher, aiming it over the rider’s head. The second “bubble” helps maintain the air’s attachment to the screen’s surface for longer, preventing it from detaching prematurely and becoming turbulent.
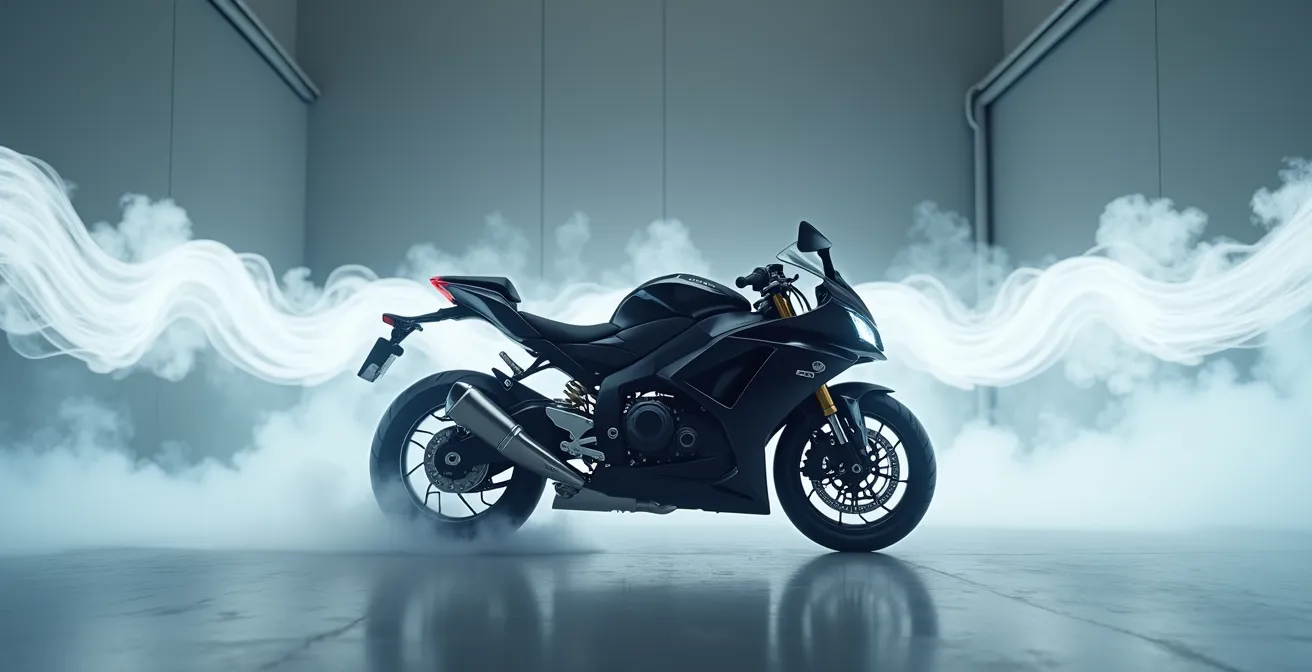
As this visualization of wind tunnel testing shows, the shape of the windscreen dictates the fate of the airflow. The objective is to produce a clean stream that clears your helmet, not a messy, buffeting wake. For many tall riders on sport and sport-touring bikes, a double bubble screen provides a superior solution by actively managing airflow dynamics, rather than just acting as a passive barrier. The key is finding the screen that moves the point of turbulent separation above your line of sight.
The High-Speed Wobble: How Top Cases Affect Stability Above 70 mph?
While we often focus on the front of the bike, the aerodynamics at the rear are just as critical, especially at highway speeds. A large top case, while practical, can act as a massive aerodynamic brake. It creates a large, low-pressure “void” directly behind it. The surrounding high-pressure air then rushes in to fill this void, creating powerful, swirling vortices. This turbulence doesn’t just stay behind the bike; it can disrupt the clean air flowing over your body and contribute to the buffeting felt at the helmet.
This turbulence is not only uncomfortable but also dangerously loud. Research shows that sound levels in a motorcycle helmet can reach 115 decibels or even more, well into the range that causes permanent hearing damage. A significant portion of this noise is low-frequency booming caused by aerodynamic turbulence originating from parts like top cases. At speeds above 70 mph, this effect is magnified, and the turbulence can introduce a “wobble” or weave by creating uneven forces on the rear of the motorcycle’s chassis.
The solution follows the same principle as managing airflow at the front: fill the pressure void. Some riders and manufacturers have found elegant solutions that prove this principle.
Case Study: The Pressure Gap Solution
In a fascinating discovery, riders found that on certain touring bikes, cutouts at the bottom of the windscreen allowed air to enter and swoop up behind it. This small amount of airflow “filled” the negative pressure zone on the rider’s side, dramatically reducing turbulence and buffeting. This same principle applies to top cases: designs that manage the rearward airflow, or even allow a small amount of air to pass through or around them smoothly, can significantly improve high-speed stability by preventing the formation of a large, disruptive pressure void.
Do Aerodynamic Winglets Actually Provide Downforce at Legal Road Speeds?
Born in the world of MotoGP, aerodynamic winglets have trickled down to production superbikes, and now, the aftermarket. Their aggressive look promises high-performance aerodynamics, but their real-world benefit for the average highway rider is often misunderstood. While they do generate some downforce to prevent wheelies at racing speeds (150+ mph), their primary function at legal road speeds is far more relevant to a tall rider’s comfort: airflow management.
At 70-80 mph, the downforce generated by most commercially available winglets is minimal. Their true value lies in how they condition the air flowing along the sides of the fairing. They act like a plow, pushing the turbulent “dirty air” generated by the front wheel and fairing away from the rider’s arms and torso. This creates a wider, calmer pocket of air for the rider, reducing pressure on the shoulders and preventing that side-to-side turbulence from reaching the helmet. As one expert on a forum noted when discussing wind solutions:
At legal speeds, their primary benefit isn’t downforce but managing airflow, pushing turbulent air away from the rider’s arms and torso
– MCrider Forum Discussion, Motorcycle Wind Buffeting Solutions Guide
Therefore, when evaluating aftermarket winglets, don’t fixate on “downforce.” Instead, assess them based on their ability to create a more serene riding environment. A good set of winglets should reduce the wind pressure felt on your arms and contribute to the overall stability of the air around your helmet. They are not a magic bullet, but another tool in your arsenal for sculpting the perfect aerodynamic pocket.
How Flapping Gear Increases Rider Fatigue on Long Rides?
Your aerodynamic silhouette doesn’t end with the hard parts of your motorcycle; it includes you and everything you’re wearing. A loose, flapping jacket or pants can be a significant source of both drag and fatigue on a long ride. Each flap and flutter is essentially a tiny, unpredictable airbrake, creating micro-turbulences that disrupt the smooth flow of air around your body. Your body must constantly make small, subconscious corrections to counteract these forces, leading to surprisingly rapid exhaustion.
It’s not just a matter of comfort. This constant battle against the wind can lead to physical pain. An article on rider ergonomics noted that the constant tension from fighting turbulence means you can tense your neck and shoulders to keep it under control and later you have a stiff neck and a splitting headache in as little as 15 minutes. A well-fitting, snug suit acts as a second skin, allowing air to flow over it with minimal disruption. Look for gear with adjustment straps at the waist, biceps, and forearms to eliminate any excess material that could catch the wind.
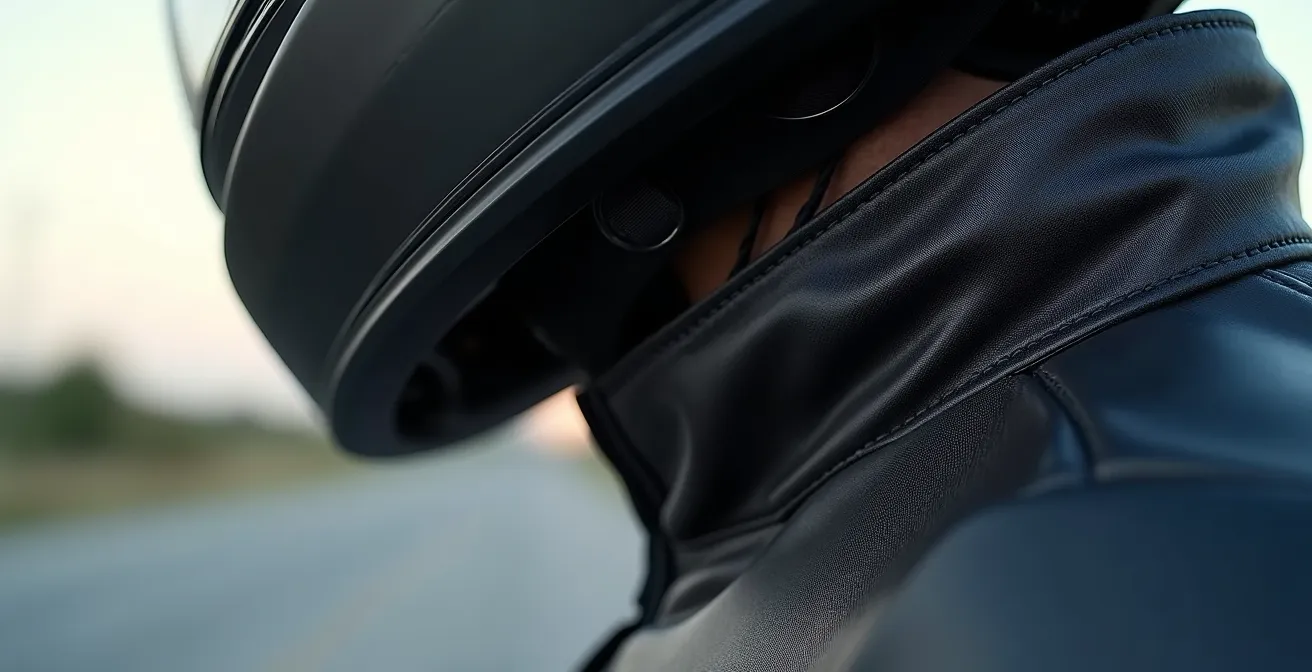
The interface between your gear and your helmet is particularly critical. A gap between your jacket collar and the bottom of your helmet can act as a scoop, funneling turbulent air directly up into the helmet. This creates upward pressure and significant noise. High-end touring gear often features tall, soft collars designed to create a seamless seal with the helmet, completing the aerodynamic shell and keeping the turbulent air out. Paying attention to this detail can make a world of difference in noise and stability.
How to Add Wind Protection to Your Roadster Without Ruining Its Aesthetics?
Roadsters and “naked” bikes are defined by their minimalist, engine-forward aesthetic. Adding wind protection without compromising this look is a common challenge for their owners, especially tall riders who are fully exposed to the wind blast. The solution is not a massive touring screen, but rather a combination of smaller, strategically placed components that manage airflow without dominating the bike’s visual profile. The goal is to “clean up” the turbulent air, not to hide behind a wall of plastic.
Instead of one large solution, think in terms of a system of subtle deflectors. Small “fly screens” can be surprisingly effective at deflecting the main blast off your chest, which in turn reduces the amount of turbulent air rising towards your helmet. Fork-mounted wind deflectors are almost invisible but can stop the powerful updraft that comes up from between the triple trees, a major source of under-helmet buffeting. Even components like large handguards or specially designed tank grips can help divert air away from the rider’s arms and legs, contributing to a calmer pocket of air.
The key is to identify the primary sources of turbulence on your specific bike and address them with targeted, low-profile solutions. The following table breaks down some popular options and their specific roles in managing airflow on a naked bike, as analyzed in a recent comparative guide.
| Protection Type | Visual Impact | Effectiveness | Best For |
|---|---|---|---|
| Fork Wind Deflectors | Minimal – Nearly Invisible | Reduces updraft from triple tree | Sport nakeds, roadsters |
| Fly Screen (6-8″) | Low – Maintains naked look | Cleans airflow to chest/neck | Retro bikes, cafe racers |
| Handguards (Large) | Moderate – Functional appearance | Deflects arm/upper body wind | Adventure-styled nakeds |
| Tank Grips with Fins | Minimal – Looks like regular grips | Diverts air from inner legs | All naked sportbikes |
Pinlock Visors: How Does a Double Pane Lens Stop Fogging Instantly?
While not directly related to buffeting, visor fogging is a critical safety and comfort issue that is solved by a brilliant piece of thermal dynamics, similar in principle to how we manage air pressure. A Pinlock visor insert is essentially a double-glazing system for your helmet. It consists of a small, flexible lens that sits on the inside of your main visor, held in place by two small pins. A silicone bead around the edge of the Pinlock insert creates a perfectly sealed air gap between it and the main visor.
This trapped layer of air acts as a thermal insulator. Fogging occurs when the warm, moist air from your breath hits the cold surface of the visor, causing the moisture to condense. With a Pinlock system, your breath only touches the inner insert, which remains close to the ambient temperature inside the helmet. The main visor gets cold from the outside wind, but the insulating air gap prevents that cold from transferring to the inner lens. No cold surface means no condensation. It’s a simple yet incredibly effective way to maintain perfect visibility in cold or humid conditions.
However, the system isn’t without its quirks. A poor seal or improper installation can negate its effects. Furthermore, the extra layer of plastic can sometimes introduce minor distortions or reflections, as one forum user noted, “I also had internal reflections of my face on the inside of the visor and they were even worse with the anti fog insert installed.” Proper maintenance is key to its performance and longevity.
Pinlock Maintenance for Maximum Anti-Fog Performance
- Clean both sides of the Pinlock insert monthly with a microfiber cloth and water only.
- Check the silicone seal for gaps or warping every 3 months to ensure a perfect air trap.
- Replace the insert annually or when you notice persistent fogging at the edges, indicating a failing seal.
- Never use alcohol-based cleaners, which can dry out and damage the flexible silicone seal.
- Store the helmet with the visor slightly ajar to prevent long-term compression of the seal.
Key takeaways
- Buffeting is a problem of negative pressure and turbulent airflow, not direct wind force.
- Your body posture and snug-fitting gear are the first and most crucial elements in creating a stable aerodynamic silhouette.
- Effective windscreens manage and smooth airflow over your head, while add-ons like winglets and deflectors help sculpt a wider, calmer air pocket around you.
ECE 22.06 vs DOT: Why the New European Standard is Safer for Your Head?
Ultimately, the battle against buffeting is part of a larger quest for safety and comfort, which brings us to the helmet itself. The certification standard a helmet meets is the single most important indicator of its protective capabilities. While the American DOT standard has been a baseline for years, the new European ECE 22.06 standard represents a quantum leap in safety testing, with direct implications for a helmet’s performance in real-world conditions, including its aerodynamic stability.
Unlike the DOT standard which relies on an honor system for manufacturers, ECE 22.06 requires mandatory batch testing. More importantly, it introduces a wider range of impact tests, including lower and higher speed impacts, and critically, an angled impact test. This simulates rotational forces, a primary cause of brain injury in many motorcycle accidents. A helmet designed to pass these rigorous tests often has a more advanced shell construction and liner, which can also contribute to better aerodynamic performance and noise insulation. The link between noise and safety is not trivial; a 2004 study found hearing loss in 40% of professional motorcycle racers, much of it attributable to wind noise.
Choosing an ECE 22.06 certified helmet is choosing a product designed and tested against the most modern understanding of crash dynamics. This often translates to a helmet that is not only safer in an impact but also more stable and quieter at speed, forming the final and most crucial piece of your anti-buffeting strategy. It ensures the very object you’re trying to stabilize is built to the highest possible standard of performance and integrity.
Frequently Asked Questions about ECE 22.06 and Buffeting
Does ECE 22.06 test for rotational forces?
Yes, unlike DOT standards, ECE 22.06 includes specific rotational acceleration testing that simulates the twisting forces on the brain during angled impacts.
Are accessories tested under ECE 22.06?
Yes, official accessories like sun visors and manufacturer-supplied communicators must be tested to ensure they don’t compromise the helmet’s structural or aerodynamic integrity.
How does ECE 22.06 relate to buffeting resistance?
Helmets designed to pass ECE 22.06’s rigorous testing often feature better overall build quality, including improved shell aerodynamics and noise insulation that help reduce buffeting effects.
By shifting your perspective from “blocking wind” to “managing airflow,” you can systematically dismantle the forces causing your helmet buffeting. Now, your next step is to apply this aerodynamic mindset to your own motorcycle and gear, analyzing each component not in isolation, but as part of a complete system.