The right choice for a mixed commute isn’t the bike itself, but adopting a modular mindset to adapt your machine for any ride.
- A naked bike’s urban agility can be paired with quick-release accessories for highway comfort, eliminating the need to compromise.
- Practical factors like insurance costs, parts security, and cargo capacity have a greater impact on daily satisfaction than pure aesthetics.
Recommendation: Start with the bike that fits your primary use case (city) and invest in a quality, adaptable “riding system” to handle the secondary (highway), rather than buying a bike that’s a poor compromise for both.
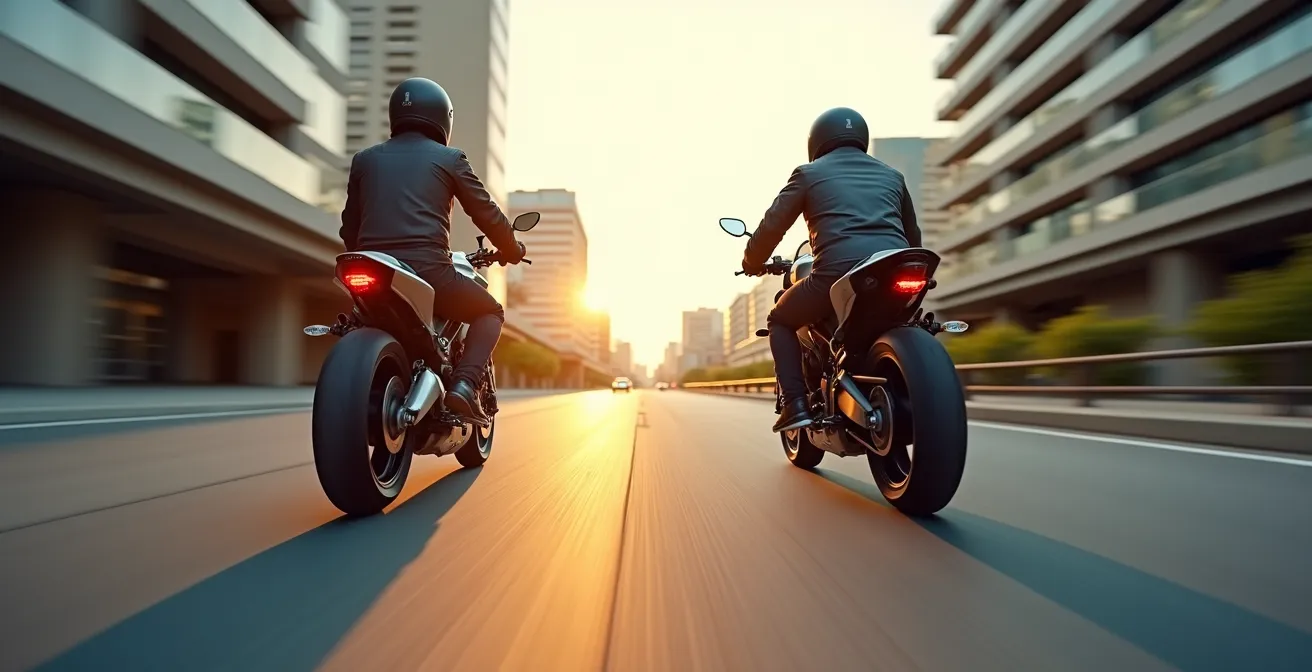
You’re standing in the showroom, caught in a classic rider’s dilemma. Your head points to the fully-faired sportbike, whispering practical thoughts about wind protection on your highway commute. But your heart is pulled toward the raw, mechanical honesty of the naked roadster. The common advice is a frustratingly simple binary: faired for the highway, naked for the city. For the rider who does both every week, this isn’t advice; it’s a dead end.
The debate often gets stuck on aesthetics versus pure function, forcing you to choose a side. But what if that’s the wrong way to think about it? The real solution isn’t about picking one permanent state but about building a modular riding system. It’s about seeing your motorcycle not as a static object, but as an adaptable platform that you can configure for the specific ride you’re doing today. This approach prioritizes practicality without completely sacrificing the aesthetic you love.
This guide isn’t about declaring a winner. It’s about giving you, the practical 50/50 rider, a framework for making a smart decision. We’ll move past the showroom floor and into the real-world consequences of your choice, examining the ergonomic penalties, security vulnerabilities, and hidden costs that define daily life with these machines. We will analyze the physics of wind fatigue, the realities of insurance premiums, strategies for urban security, and the critical choices between OEM and aftermarket parts to maintain your bike’s system integrity.
To get a better feel for the machines we’re discussing, the following video offers a great visual comparison of some of the most popular middleweight naked bikes on the market. It perfectly illustrates their agility and character.
To help you navigate these critical decision points, this article is structured to address the most pressing questions you’ll face as a rider with a mixed commute. The following summary outlines the practical challenges and solutions we’ll explore in detail.
Summary: A Practical Framework for the 50/50 Rider’s Choice
- Why Your Neck Hurts After 45 Minutes of Highway Riding on a Naked Bike?
- How to Add Wind Protection to Your Roadster Without Ruining Its Aesthetics?
- Roadster vs Supersport: Which Costs Less to Insure for a 25-Year-Old Rider?
- The Parking Mistake That Leaves Your Naked Bike Vulnerable to Parts Theft
- How to Soften Your Roadster Suspension for Rough City Streets?
- Backpack or Top Case: Which Suits a Laptop-Carrying Professional Best?
- Which Gear Ratio to Choose for Tight Switchbacks to Avoid Stalling?
- OEM vs Aftermarket: When Is It Worth Paying Double for Factory Parts?
Why Your Neck Hurts After 45 Minutes of Highway Riding on a Naked Bike?
The “freedom” of riding a naked bike comes at a physical cost, a concept we’ll call the ergonomic penalty. On the highway, this penalty is paid directly by your neck and upper body. You are a human airbrake, and the constant, immense pressure of the wind is what leads to significant fatigue. It’s not a matter of toughness; it’s a matter of physics. Your helmet acts like a parachute, catching the wind and straining the muscles that hold your head up.
This isn’t just a feeling; it’s a measurable force. The core of the problem lies in how wind resistance scales with speed. It doesn’t increase linearly; it increases exponentially. Studies on aerodynamics confirm the physics of wind resistance shows that force quadruples when doubling speed from 30 to 60 MPH. That gentle breeze you feel at city speeds becomes a relentless shove on the highway, forcing your body into a constant state of tension.
After about 45 minutes, your sternocleidomastoid and trapezius muscles—the primary muscles supporting your head—are exhausted. This leads to that familiar deep ache, stiffness, and even headaches that can persist long after the ride is over. It’s the single biggest practical drawback of choosing a naked bike for a commute that includes significant highway time, and it directly impacts your comfort and concentration.
How to Add Wind Protection to Your Roadster Without Ruining Its Aesthetics?
The most common solution to the ergonomic penalty of wind is a windscreen, but for many naked bike owners, this feels like an aesthetic betrayal. The key is to shift your thinking from a permanent modification to a “configuration-for-the-ride” approach. Your bike doesn’t have to be a static showpiece; it can be a practical, modular tool. Modern solutions allow you to add effective wind protection for your highway commute and remove it for city riding or weekend coffee runs.
There are three main categories of windscreens, each offering a different balance of protection and style. A small flyscreen offers minimal protection but preserves the bike’s lines. A medium sport screen provides a noticeable reduction in chest pressure without overwhelming the front end. A full touring screen offers maximum comfort but significantly alters the bike’s appearance. Seeing these options side-by-side clarifies the trade-offs.
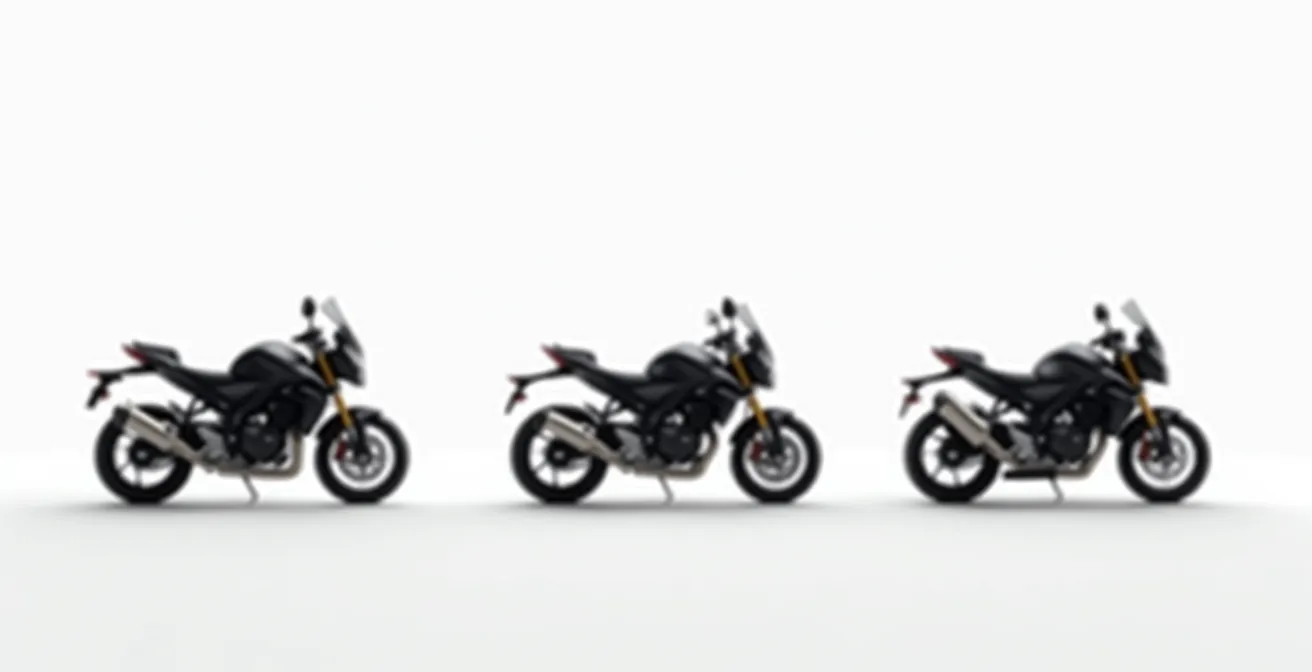
As the image demonstrates, the visual impact varies dramatically. The beauty of a modular system is that you don’t have to choose just one. The market has evolved to cater specifically to riders like you, who want the best of both worlds.
Case Study: Quick-Release Systems for the Weekend Tourer
Leading manufacturers like SW-Motech and Givi have perfected quick-release mounting systems. These allow a rider to install a full-size touring windscreen in under 30 seconds using a few simple twist-locks, no tools required. This transforms a city-focused roadster into a capable highway machine for a weekend trip. When they return, the screen comes off just as fast, restoring the clean, naked aesthetic for the daily commute. This “best of both worlds” approach is a perfect example of a practical, modular riding system in action.
Roadster vs Supersport: Which Costs Less to Insure for a 25-Year-Old Rider?
For a young rider, the cost of insurance is a major, often underestimated, part of the ownership equation. It’s not just about the purchase price. When comparing a naked roadster to a supersport, the difference in insurance premiums can be staggering, easily amounting to hundreds or even thousands of dollars per year. For a 25-year-old, a supersport will almost always be significantly more expensive to insure, and the reasons go far beyond engine size.
Insurers classify bikes into risk categories. A 650cc naked bike like a Suzuki SV650 is typically classed as “Standard,” while a 600cc supersport like a Yamaha R6 is classed as “Supersport.” Despite the smaller displacement, the supersport’s aggressive riding posture, high-performance capabilities, and, crucially, the accident statistics associated with its rider demographic, place it in a much higher risk pool. The classification alone can account for a 40-60% premium increase.
Beyond classification, insurers look at repair costs and theft rates. The expensive, full-coverage plastic fairings on a supersport can add over $1,500 to a simple tip-over claim compared to a naked bike. Supersports are also stolen at a much higher rate. These factors compound, making the naked roadster the clear financial winner for a budget-conscious young rider.
The following table, based on common industry data, breaks down the key factors that influence insurance premiums for these two types of motorcycles. The data is often sourced from comprehensive analyses like those found in recent motorcycle insurance cost studies.
| Factor | Naked/Roadster | Supersport | Impact on Premium |
|---|---|---|---|
| Bike Classification | Standard/Naked | Sport/Supersport | Sport bikes 40-60% higher |
| Typical Engine Size | 650-900cc | 600-1000cc | Similar displacement, different risk profile |
| Repair Costs | No fairings to replace | Expensive plastic fairings | $500-2000 difference per claim |
| Theft Statistics | Lower theft rate | Higher theft rate | 15-20% premium difference |
| Accident Statistics (Under 30) | Lower claim frequency | Higher claim frequency | Most significant factor |
The Parking Mistake That Leaves Your Naked Bike Vulnerable to Parts Theft
The very design that makes a naked bike visually appealing—its exposed engine and components—also makes it a prime target for opportunistic parts thieves. Unlike a faired bike where components are hidden, a roadster displays its most valuable and easily removable parts for all to see. The most common parking mistake isn’t just failing to lock your bike; it’s failing to think strategically about *how* and *where* you park to protect these vulnerable components.
Thieves target high-value, easily-removable parts with good resale value. An aftermarket exhaust, a Brembo brake caliper, or a modern digital dashboard can be removed in minutes with basic hand tools. Simply using a disc lock or chaining the frame isn’t enough if these expensive bolt-on parts are left exposed. The solution is a layered security strategy that combines physical locks with strategic positioning.
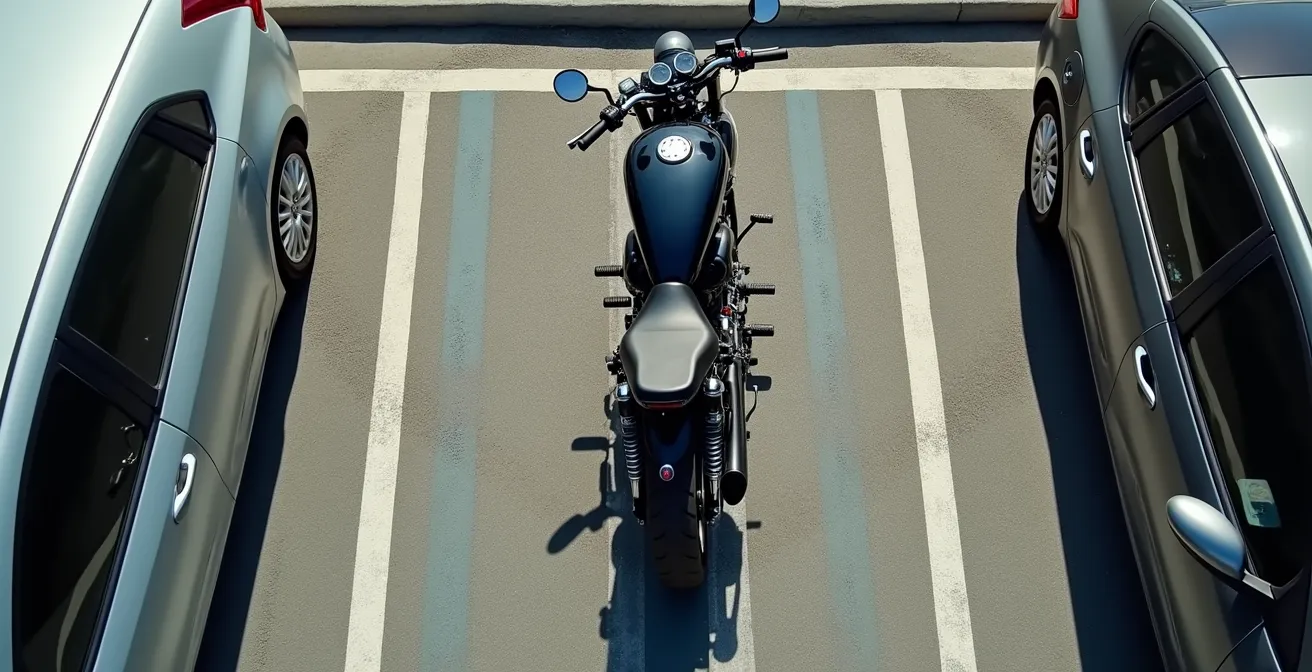
This means always parking in well-lit, high-traffic areas. When possible, position the most valuable side of your bike (often the exhaust side) against a wall or another vehicle to restrict access. Use multiple, varied locks—a disc lock on the front, a heavy chain through the frame to an immovable object, and the bike’s built-in steering lock. This multi-layered approach makes your bike a less appealing target, encouraging thieves to move on to easier prey.
Your 5-Point Urban Parking Security Audit
- Component Exposure: Identify the most expensive and accessible parts on your bike (exhaust, brakes, dash). Which side of the bike are they on? This is the side you must protect.
- Anchor Points: When you park at home or work, what immovable objects are available? Audit your environment for solid poles, ground anchors, or railings to chain your frame to.
- Lock Inventory: Do you have at least two different types of locks (e.g., disc lock and chain)? A single lock type is easily defeated by a prepared thief.
- Environmental Scan: Is your typical parking spot well-lit? Is it covered by security cameras? Is there frequent foot traffic? An isolated, dark spot is an open invitation.
- Strategic Positioning Plan: Before you dismount, have a plan. Always turn your handlebars to engage the steering lock and orient the bike to shield its most valuable components.
How to Soften Your Roadster Suspension for Rough City Streets?
Many naked bikes, especially those with a sporty edge, come from the factory with suspension set for smooth, winding roads, not the harsh reality of pothole-ridden city streets. This can result in a jarring, uncomfortable ride that transmits every imperfection directly to your spine. Softening your roadster’s suspension is one of the most effective ways to improve daily comfort, and you can often make significant improvements without spending a fortune.
The first and most important step is to set your rider sag. Sag is the amount the suspension compresses under your weight. Most manuals provide a target range (typically 30-35mm). Adjusting the spring preload is the primary way to achieve this. Too little sag will make the ride harsh over small bumps, while too much will cause the suspension to bottom out over large ones. Getting this right is a free adjustment that makes a huge difference.
Next, you can look at damping adjustments if your bike has them. Compression damping controls how fast the suspension compresses, while rebound damping controls how fast it extends. For rough city streets, you generally want to reduce (soften) both. Start by backing them off two clicks from the standard setting and test the feel. The goal is a controlled but compliant ride, not a mushy or bouncy one. Small, incremental changes are key.
If your budget allows and these adjustments aren’t enough, consider professional upgrades. A simple but effective modification is changing the fork oil to a lighter weight (e.g., from 10W to 5W), which can soften the initial part of the suspension travel. For a complete transformation, investing in new springs matched to your weight or a fully adjustable aftermarket shock will provide the ultimate level of control and comfort for urban environments.
Backpack or Top Case: Which Suits a Laptop-Carrying Professional Best?
For the professional who commutes by motorcycle, carrying a laptop presents a practical and ergonomic challenge. The choice between a backpack and a hard-mounted top case is a classic debate, but when viewed through the lens of practicality and rider health, the answer becomes clear. A backpack, while simple, imposes a significant ergonomic penalty that a top case completely avoids.
The issue with a backpack is that it places the entire weight of your laptop and other items directly onto your shoulders and spine, while also raising your center of gravity. As noted in ergonomic studies, this has a direct impact on rider fatigue and control. An expert from a Rider Fatigue and Load Distribution Analysis highlighted this issue:
A 10lb backpack with a laptop raises your center of gravity, puts direct strain on your spine and shoulders, and causes fatigue, which can impair focus during a commute.
– Motorcycle Ergonomics Study, Rider Fatigue and Load Distribution Analysis
A top case, by contrast, places the load on the bike’s subframe, not your body. This means zero physical load on the rider, reducing fatigue and improving comfort. It also offers superior weather and vibration protection for sensitive electronics. While a top case represents a higher initial investment and can impact the bike’s clean aesthetic, its practical benefits for a daily, laptop-carrying commuter are undeniable.
The following table compares the most common laptop transport options, breaking down their respective advantages and disadvantages for the daily commuter.
| Factor | Backpack | Top Case | Tank Bag |
|---|---|---|---|
| Physical Load on Rider | 10-15 lbs on spine/shoulders | Zero load on body | Zero load on body |
| Center of Gravity Impact | Raises COG, affects handling | High rear COG, minimal impact | Low central COG, best handling |
| Weather Protection | Depends on bag quality | 100% weatherproof | Usually weatherproof |
| Vibration Protection | Transmits through body | Foam lining isolates | Tank padding isolates |
| Professional Appearance | Arrives sweaty | Must leave on bike | Carries like briefcase |
| Typical Cost | $50-200 | $200-500 + mounting | $100-300 |
Which Gear Ratio to Choose for Tight Switchbacks to Avoid Stalling?
Riding a naked bike on tight, technical roads like switchbacks can be incredibly rewarding, but it also exposes flaws in technique and setup. A common problem for less experienced riders is a jerky throttle response in first gear or the risk of stalling in second. Choosing the right gear—and knowing how to use it—is critical for maintaining smoothness and stability. The key is to make second gear your best friend.
First gear on most modern bikes is too short and snatchy for delicate throttle inputs in a tight corner. The moment you try to reapply power, the bike lurches forward, upsetting your balance. Second gear is the ‘golden gear’ for most switchbacks. It provides a smoother, more predictable power delivery. However, to prevent stalling at low RPMs, you need to master the art of combining clutch, throttle, and rear brake.
The technique involves maintaining steady RPMs (usually in the 3,000-5,000 range) and using light “feathering” of the clutch and a gentle drag of the rear brake to modulate your speed. This creates a stable, fluid motion through the corner without the lurching associated with on-off throttle application. For bikes with strong engine braking, like many V-twins, you can use this to your advantage to control entry speed without even touching the brakes.
Case Study: Sprocket Changes for Mixed Riding
For riders who frequently tackle technical roads, a simple gearing modification can make a world of difference. Changing the rear sprocket to one with two additional teeth (e.g., going from a 43-tooth to a 45-tooth) is a popular modification on bikes like the MT-07 or Z650. This change effectively lowers the overall gearing, improving low-speed acceleration and making second gear more usable in tight corners, significantly reducing stall risk. The trade-off is slightly higher RPMs at highway speeds (around 500 RPM higher at 70 mph), but many riders find this a worthwhile compromise for enhanced maneuverability.
Action Plan: Mastering Tight Corners
- Identify Your ‘Golden Gear’: On a familiar, safe road, practice taking a tight corner in both first and second gear. Feel the difference in throttle response and smoothness. Make a conscious decision to use second gear as your default.
- Practice Low-Speed Control: In an empty parking lot, practice riding at a walking pace in second gear, using only the clutch and rear brake to control your speed while keeping the throttle steady.
- Isolate Engine Braking: On a gentle downhill slope, practice using only engine braking to slow the bike. This helps you understand your bike’s natural deceleration characteristics.
- Combine the Techniques: Find a series of gentle curves and practice entering with engine braking, maintaining speed with the rear brake and clutch, and exiting smoothly with a gentle throttle roll-on.
- Audit Your RPMs: Pay attention to your tachometer. Are you keeping the engine in its happy place (3-5k RPM)? If you’re consistently dropping below that, you’re at risk of stalling.
Key Takeaways
- The choice between naked and faired is not binary; a modular approach allows a naked bike to be adapted for any use case.
- Practical considerations like insurance costs, security, and cargo solutions often have a greater impact on daily rider satisfaction than initial aesthetics.
- Investing in adaptable systems (quick-release screens, strategic locks, suspension tuning) turns a single motorcycle into a versatile platform.
OEM vs Aftermarket: When Is It Worth Paying Double for Factory Parts?
As you build out your modular riding system, you’ll inevitably face the choice between Original Equipment Manufacturer (OEM) parts and aftermarket alternatives. The price difference can be significant, with factory parts typically costing 40-60% more. While it’s tempting to save money with aftermarket options, this decision should be guided by a single principle: system integrity. For critical components, the guaranteed quality and fitment of OEM parts is worth the premium.
The distinction lies between critical safety components and cosmetic or ergonomic enhancements. For parts like brake pads, calipers, wheel bearings, and engine internals, OEM is the only sensible choice. These parts are designed with precise tolerances and material specifications that are guaranteed to work flawlessly with the rest of your bike’s systems. A failure in one of these areas is not an inconvenience; it’s a catastrophic safety risk.
Conversely, for parts like mirrors, levers, handlebars, or even exhaust systems, high-quality aftermarket options can offer superior performance, better ergonomics, or significant weight savings compared to the factory units. Here, the goal is customization and improvement, and the aftermarket provides a wealth of choices. The key is to choose reputable brands that have a proven track record of quality.
This decision framework helps to clarify where it’s wise to save money and where it’s critical to invest in quality for the sake of safety and reliability.
| Part Category | Recommended Choice | Reasoning | Cost Impact |
|---|---|---|---|
| Brake Components | OEM | Safety critical, precise tolerances required | 2x aftermarket price |
| Engine Internals | OEM | Warranty preservation, guaranteed compatibility | 1.5-2x aftermarket |
| Wheel Bearings | OEM | Failure risk too high, minimal savings | 1.4x aftermarket |
| Mirrors/Levers | Quality Aftermarket | Better features, customization options | 0.5-0.7x OEM cost |
| Exhaust Systems | Premium Aftermarket | Performance gains, weight savings | Similar to OEM |
| Handlebars | Aftermarket | Ergonomic improvements available | 0.6x OEM cost |
Ultimately, choosing the right configuration is an ongoing process. By applying this practical, modular framework, you can build a motorcycle that is not only a joy to look at but also perfectly suited to the demands of your real-world riding life.
Frequently Asked Questions About Motorcycle Setup for Mixed Riding
When should I upgrade from stock suspension?
If you experience harsh impacts over repeated bumps, bottoming out on larger impacts, or inability to achieve proper sag with preload adjustment, it’s time to consider upgraded springs or a fully adjustable shock.
What’s the difference between compression and rebound damping?
Compression damping controls how quickly the suspension compresses when hitting a bump, while rebound controls how fast it extends afterward. Too little compression makes the bike feel mushy; too much makes it harsh.
Can I just change fork oil weight for a softer ride?
Yes, switching from 10W to 5W fork oil is a cost-effective first modification that can noticeably soften the initial stroke of the suspension, though it won’t address underlying issues with an incorrect spring rate for your weight.