In summary:
- Your motorcycle’s final drive is part of an interconnected system; understanding its sounds and needs prevents major issues.
- Chain drives offer the highest efficiency but demand regular cleaning and lubrication (every 300-600 miles).
- Belt and shaft drives reduce maintenance but come with their own trade-offs in weight, power loss, and repair complexity.
- Seemingly isolated issues like a “clunk” in first gear or jerky throttle are often symptoms of the entire powertrain’s dynamics.
- Regular pre-ride checks (T-CLOCS) are the most effective way to develop “mechanical empathy” and catch problems early.
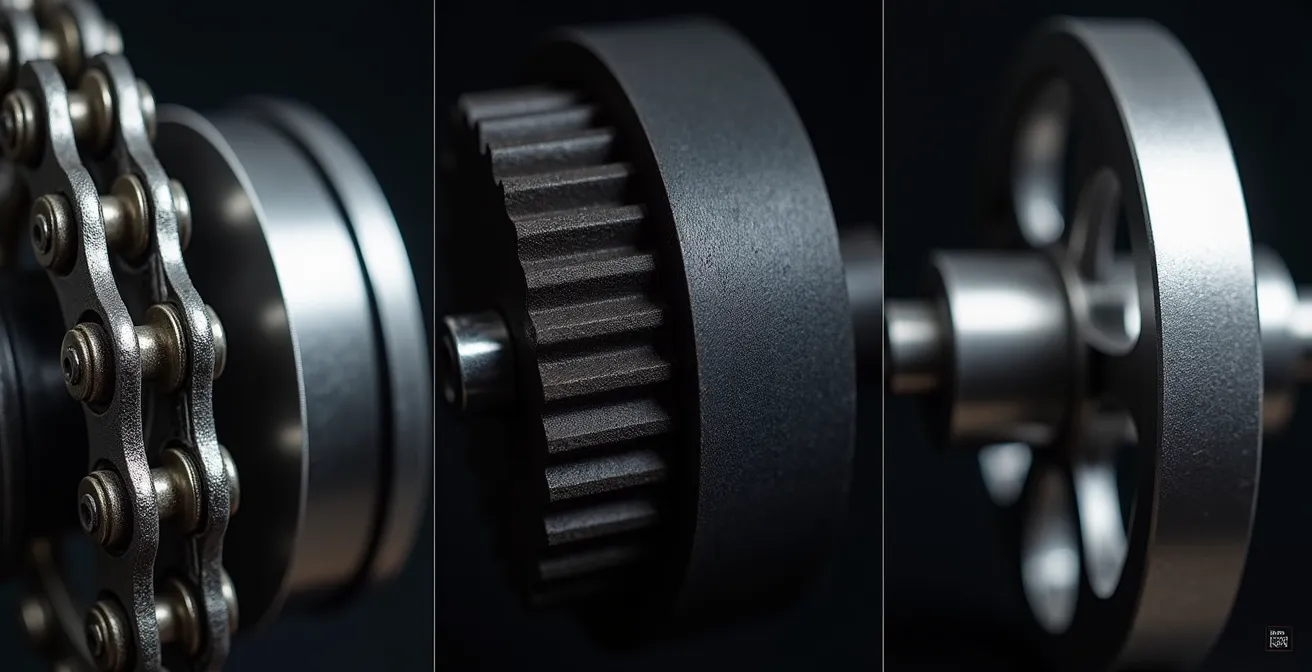
The debate between chain, belt, and shaft drive systems is a classic one in motorcycling. Many articles present simple pro-and-con lists: chains are efficient but messy, belts are quiet but less robust, and shafts are clean but heavy. While these points are true, they barely scratch the surface. This focus on isolated components misses the bigger picture. A motorcycle’s powertrain is a complex, interconnected ecosystem where the engine, clutch, gearbox, and final drive are in constant communication. The noises it makes, the way it feels under acceleration, and the wear it shows are all part of a language.
But what if the key to choosing the right system—and maintaining it properly—wasn’t just weighing pros and cons, but learning to understand this mechanical language? Instead of just treating symptoms like a jerky throttle or a loud clunk, what if you could understand the root cause within the powertrain dynamics? This is the perspective of a mechanical engineer: viewing the machine not as a collection of parts, but as a single, functioning system. True mastery comes from developing a kind of mechanical empathy, where you can interpret what your bike is telling you through its behavior.
This guide moves beyond the surface-level debate. We will explore a series of common, practical questions that riders face. By dissecting each one, we’ll uncover the ‘why’ behind the ‘what,’ revealing how everything from clutch feel to gear ratios impacts your ride. This journey will equip you not just with maintenance tips, but with the diagnostic mindset needed to truly understand and harmonize with your motorcycle’s powertrain.
To navigate this deep dive into your bike’s powertrain, the following sections address the most pressing questions riders have about their transmission and final drive, providing a comprehensive understanding of the entire system.
Summary: Understanding Your Motorcycle’s Powertrain
- Why Your Gearbox Clunks When Shifting into First Gear?
- How to Clean and Lube Your Chain in 15 Minutes Without Making a Mess?
- Wet vs Dry Clutch: What Is the Difference in Feel and Maintenance?
- How an ECU Flash Smoothes Out Jerky Throttle Response at Low RPM?
- The Metallic Shimmer in Your Oil: When to Worry About Engine Bearings?
- No Clutch, No Gears: Does Removing Shifting Ruin the Engagement of Riding?
- Which Gear Ratio to Choose for Tight Switchbacks to Avoid Stalling?
- The T-CLOCS Inspection: How to Check Your Bike in 5 Minutes Before Every Ride?
Why Your Gearbox Clunks When Shifting into First Gear?
That pronounced “clunk” when shifting from neutral into first gear on a stationary motorcycle is a near-universal experience, but it’s not a sign of a problem. It’s the sound of engineering at work. Most motorcycles use a constant-mesh transmission, where the gears are always engaged with each other. Shifting doesn’t move the gears themselves, but rather slides “dog collars” or “dogs” to lock a specific gear to the spinning transmission shaft. When your bike is in neutral, the clutch plates are disengaged, but the input shaft from the engine is still spinning, and the output shaft is stationary. The clunk is the sound of the dogs on the spinning shaft forcefully engaging with the dogs on the stationary one, instantly arresting the rotation. The viscosity of the engine oil plays a huge role here; it creates a “drag” that keeps parts moving even with the clutch pulled in.
While a standard clunk is normal, an exceptionally loud or violent one can indicate an issue. A common cause is a high idle speed, which increases the rotational speed difference between the moving and stationary parts, amplifying the impact. Another factor could be the oil itself; using an oil that is too thick for your climate or not recommended by the manufacturer can increase clutch drag. In more serious cases, it could point to a problem within the clutch itself.
A really big clunk when shifting into first often means a warped steel plate, especially if the bike creeps when you rev it with the clutch in and in gear.
– MotoGP Werks technician, Motorcycle.com
To minimize this sound and the associated mechanical stress, you can adopt a few simple habits. First, always let the engine warm up to its normal idle speed before riding. Second, pull the clutch lever in and wait a few seconds before selecting first gear. This brief pause allows the oil drag to dissipate and the input shaft to slow down, resulting in a much smoother, quieter engagement. Simple adjustments and the right fluids are key to harmonizing your bike’s powertrain dynamics.
- Wait 5-10 seconds after pulling the clutch before engaging first gear to let internal components slow down.
- Use manufacturer-recommended synthetic gear oil designed for your engine type and climate.
- Check and adjust idle speed to manufacturer specifications, as a high idle can amplify clunking.
How to Clean and Lube Your Chain in 15 Minutes Without Making a Mess?
For riders with chain-driven motorcycles, maintenance is a non-negotiable part of ownership. A poorly maintained chain not only wears out quickly but also robs your bike of power and can be a significant safety hazard. As a rule of thumb, experts recommend that street riders should clean and lube their chain every 300-600 miles and after every ride in the rain. The goal is to remove grit that acts like sandpaper on your sprockets and to lubricate the O-rings that seal grease inside the chain’s rollers. A clean, well-lubed chain operates with minimal friction and noise, a clear sign of a healthy drivetrain.
The key to a fast, mess-free job is having the right tools and a good technique. You’ll need a rear stand, a quality chain cleaner, a three-sided grunge brush, some rags, and your preferred chain lube. The process is simple: with the bike on the stand, spray the cleaner onto a section of the chain while rotating the rear wheel. Use the grunge brush to scrub all four sides of the links, breaking up grime. Wipe the chain clean with a rag. Repeat this process until the entire chain is clean. The final step is lubrication. Apply a thin, even coat of lube to the inside of the chain’s run. The centrifugal force from riding will distribute the lube outwards, coating the O-rings and rollers. Doing this after a ride when the chain is warm helps the lube penetrate more effectively. Let the lube set for at least 30 minutes to an hour to minimize fling-off.
Choosing the right lubricant is critical and depends on your riding environment. A mismatched lube can either attract excessive dirt or get washed off too easily, defeating the purpose of your hard work. This is a clear example of how understanding your equipment and environment leads to better system performance.
| Lube Type | Best For | Characteristics |
|---|---|---|
| Dry Lube | Hot, dusty climates | Less dirt attraction, lighter coating |
| Wet Lube | Rainy, humid conditions | Better water resistance, heavier film |
| Wax-Based | Mixed conditions | Minimal fling-off, longer intervals |
| Gear Oil | Budget option | Effective but messier application |
Wet vs Dry Clutch: What Is the Difference in Feel and Maintenance?
The clutch is the critical interface between engine power and the transmission, and whether it’s a “wet” or “dry” system dramatically changes the motorcycle’s character, feel, and maintenance needs. A wet clutch, found on the vast majority of motorcycles, is bathed in engine oil. This oil serves two purposes: it cools the clutch plates during engagement and provides a smooth, progressive feel as the plates slip and grip. The oil dampens the engagement, making for a forgiving experience, especially in stop-and-go traffic. Maintenance is minimal; as long as you perform regular oil changes, the clutch is largely a “fit and forget” component, often lasting the life of the engine.
A dry clutch, on the other hand, operates in the open air, with no oil bath. This design offers a more direct and immediate power transfer, as there is no fluid to cause drag. This results in slightly more power reaching the rear wheel and a very distinct mechanical feel. However, this directness comes at a cost. Without oil for cooling, dry clutches can overheat more easily under heavy use. They are also much louder, producing a characteristic rattling or jingling sound at idle that is an iconic part of the ownership experience for brands like Ducati.
Case Study: Ducati’s Dry Clutch Signature Sound
Ducati motorcycles are renowned for their distinctive dry clutch ‘rattle’—a mechanical signature that riders either love or find annoying. As noted in a deep dive on drivetrain components, this acoustic characteristic comes from the direct metal-on-metal engagement without oil dampening, creating immediate feedback but requiring more frequent adjustment and plate replacement compared to wet clutch systems.
This image provides a clear visual distinction between the two systems, highlighting the submerged environment of the wet clutch versus the open-air assembly of the dry clutch.

From a maintenance perspective, dry clutches require more attention. The clutch plates wear faster and create dust that needs to be cleaned out periodically. Plate replacement is a more frequent and costly job compared to wet clutch systems. The choice between them is a classic trade-off: the smooth, low-maintenance convenience of a wet clutch versus the raw, high-feedback performance and unique character of a dry clutch. It’s a perfect example of how engineering choices create a specific riding personality.
How an ECU Flash Smoothes Out Jerky Throttle Response at Low RPM?
Modern motorcycles, especially those produced in the last two decades, are heavily reliant on their Engine Control Unit (ECU) for performance. The ECU is the bike’s brain, managing everything from fuel injection to ignition timing. To meet stringent emissions regulations, manufacturers often program the fuel maps to run very lean, particularly at low RPMs. This leanness, combined with aggressive ignition timing, can lead to a snatchy or jerky throttle response, making smooth control in slow-speed maneuvers difficult. This is often felt as an abrupt on/off power delivery, sometimes called “chain snatch” in chain-driven bikes or contributing to “shaft jacking” in shaft-driven models. The latter is a tendency for the rear of a shaft-drive bike to rise or fall during acceleration and deceleration due to torsional forces.
An ECU flash is a process of rewriting the stock programming with an optimized map. A professional tuner can adjust the fuel-to-air ratio to be slightly richer in those problematic low-RPM zones, modify the ignition timing for a smoother power curve, and even change the “throttle-by-wire” maps that translate your wrist movement into throttle plate opening. This doesn’t just “add power”; its primary benefit for most street riders is creating a much more linear and predictable throttle response. The result is a bike that is easier and more pleasant to ride, allowing for finer control and a more connected feel between the rider and the machine. This is crucial in managing the torsional load through the drivetrain, regardless of the final drive type.
While chains are the most efficient at transferring power, other systems have different trade-offs. For instance, optimizing power delivery is especially important in shaft drives, as some designs have notable parasitic losses. Studies have shown that shaft drive systems can lose up to 31% of engine power before it reaches the rear wheel, making a smooth and efficient delivery even more critical. An ECU flash can significantly improve the ride quality by harmonizing the engine’s output with the characteristics of the final drive system. Benefits include:
- Reduces ‘chain snatch’ in chain-driven bikes through smoother power delivery.
- Minimizes ‘shaft jacking’ effect in shaft-driven motorcycles during throttle transitions.
- Allows customization of throttle maps for touring vs. performance riding styles.
The Metallic Shimmer in Your Oil: When to Worry About Engine Bearings?
Changing your motorcycle’s oil is more than just routine maintenance; it’s a health check-up for your engine. The old oil contains a wealth of diagnostic information. A faint, glittery shimmer in the drained oil, often resembling metallic paint, is a common sight and usually not a cause for alarm. This is typically made up of very fine aluminum particles from the normal break-in and wear of clutch components and other moving parts. However, the type, size, and quantity of metal particles can signal serious trouble, particularly with engine bearings.
The key to this form of system diagnosis is learning to identify different types of metal. Silvery, non-magnetic flakes are likely aluminum from the clutch or piston skirts. Golden or brass-colored particles are a more significant warning sign, as they often come from the bearing cages or thrust washers. The most alarming discovery is ferrous (magnetic) particles, which look like dark, steel-colored shards or filings. These indicate wear on critical steel components like gears, crankshafts, or, most critically, the roller elements of engine bearings. If you find anything larger than fine dust, or if the oil contains visible flakes of brass or steel, it’s time for an immediate investigation by a qualified mechanic.
This macro view shows the different types of metal particles you might find, each telling a different story about your engine’s internal health.

A simple and highly effective tool for early detection is a magnetic drain plug. It captures any ferrous particles circulating in the oil, concentrating them in one place for easy inspection during an oil change. Seeing a light “fuzz” of metallic paste on the magnet is normal, but finding larger chips or an excessive amount of material is a clear red flag that something is wearing out abnormally fast.
Case Study: The Diagnostic Value of a Magnetic Drain Plug
The practical benefit of this simple component is well-documented. For example, a service center analysis found that installing magnetic drain plugs led to early detection of bearing issues in a significant number of cases, preventing catastrophic engine failures. By capturing ferrous particles that indicated abnormal wear, mechanics could perform timely interventions, saving customers from potentially thousands in rebuild costs. This highlights how a small, proactive measure can provide invaluable diagnostic information.
No Clutch, No Gears: Does Removing Shifting Ruin the Engagement of Riding?
For many traditionalists, the act of clutching and shifting is the very soul of motorcycling. It’s a physical, engaging dance between rider and machine. The rise of automatic and semi-automatic transmissions, therefore, often sparks a debate: does removing manual shifting fundamentally ruin the experience? The answer depends entirely on how you define “engagement.” While it removes the task of gear selection, it doesn’t eliminate the need for rider skill; it simply shifts the rider’s focus to other critical aspects of riding.
Systems like Honda’s Dual-Clutch Transmission (DCT) offer automated shifting that is faster and more precise than most human riders can achieve, with distinct gear changes that still provide mechanical feedback. On the other end of the spectrum, the Continuously Variable Transmission (CVT) found on most scooters provides seamless, twist-and-go acceleration with no steps at all. Electric motorcycles offer yet another experience with direct drive, delivering instant torque without any shifting required. In all these cases, the rider is freed from managing the clutch and shifter, allowing them to dedicate more mental bandwidth to line choice, braking points, body positioning, and hazard perception on the road.
Automatic transmissions don’t remove engagement, they shift it. By automating the ‘what’ and ‘when’ of shifting, the rider can focus more on line choice, braking points, and road hazard perception.
– Honda DCT Engineering Team, Motorcycle Technology Review
The type of automatic system is often paired with a final drive that complements its characteristics. For example, the smooth power delivery of a CVT is a natural fit for a quiet, low-maintenance belt drive, common on maxi-scooters. The powerful, distinct shifts of a DCT can be paired with either a robust chain or a maintenance-free shaft drive, as seen on many of Honda’s touring and adventure models.
| System Type | Shift Feel | Best Paired With |
|---|---|---|
| CVT (Scooter) | Seamless acceleration | Belt drive |
| DCT (Dual Clutch) | Distinct gear changes | Chain or shaft drive |
| Electric Direct Drive | No shifting required | Belt or chain drive |
Which Gear Ratio to Choose for Tight Switchbacks to Avoid Stalling?
Navigating tight, low-speed switchbacks, especially on a steep incline, is one of the most technically demanding aspects of riding. A common problem is that first gear is too “tall,” meaning the bike wants to go faster than the turn allows, forcing the rider to constantly slip the clutch to avoid stalling. This is a problem of gear ratio. The final drive gear ratio, determined by the size of the front and rear sprockets (or pulleys), dictates how many times the engine turns for every rotation of the rear wheel. A “shorter” or “lower” gear ratio provides more torque at the rear wheel at lower speeds, making the bike easier to control in technical terrain.
Modifying this ratio is a common performance upgrade, but the ease and cost vary dramatically depending on your final drive type. For a chain drive, it’s a relatively simple and inexpensive process. Changing the front sprocket by one tooth has a much larger effect than changing the rear. A common modification for better low-end torque is to go down one tooth on the front sprocket (-1) or up two to three teeth on the rear (+2 or +3). This makes the bike more responsive at low speeds and helps prevent stalling, at the cost of slightly lower top speed and higher RPMs at cruising speed. This is possible because chain drives are incredibly efficient, achieving 96-99% power transmission efficiency, so every bit of engine power is effectively used.
For belt and shaft drives, the options are far more limited and expensive. Changing the gear ratio on a belt drive usually requires replacing both the front and rear pulleys as a matched set, which is a more involved and costly job. For a shaft drive, it’s the most complex of all; changing the ratio requires replacing the entire internal ring and pinion gear set within the final drive housing, a job best left to specialized professionals. For these bikes, mastering low-speed control techniques, like using the rear brake simultaneously with the clutch to maintain momentum at sub-walking speeds (riding the “friction zone”), becomes an even more essential skill.
- Chain Drive: Change front sprocket -1 tooth or rear +2 teeth for more low-end torque.
- Belt Drive: Limited options; consider changing both pulleys as a set.
- Shaft Drive: Ratio changes require complete differential replacement (expensive).
- Master friction zone riding: Use clutch and rear brake simultaneously for sub-walking speeds.
Key takeaways
- A motorcycle’s powertrain is a single, communicative system; its sounds and feelings are diagnostic data, not just noise.
- Maintenance is not a chore but a conversation with your machine. Regular, mindful checks prevent catastrophic failures.
- The “best” final drive system is the one that best matches your personal tolerance for maintenance, your riding style, and your desire for mechanical feedback.
The T-CLOCS Inspection: How to Check Your Bike in 5 Minutes Before Every Ride?
The most powerful tool for developing mechanical empathy and ensuring a safe ride is the pre-ride inspection. The Motorcycle Safety Foundation’s T-CLOCS checklist is the industry standard, a comprehensive acronym that guides you through checking Tires, Controls, Lights, Oil, Chassis, and Stands. A quick, five-minute version focused on the final drive system can save you from a ride-ending failure or worse. It involves using your senses—sight, sound, and touch—to assess the health of your drivetrain before you even start the engine.
For a chain drive, this means visually inspecting for rust or kinked links and checking the slack. The chain should have a specific amount of up-and-down play (typically 0.8-1.2 inches, but check your manual), measured in the middle of its lower run. Too tight, and it will strain bearings; too loose, and it could jump off the sprocket. For a belt drive, you’ll look for proper tension and inspect the belt for any embedded stones, cracks, or fraying. For a shaft drive, the check is simplest: look for any signs of gear oil leaking from the final drive housing at the rear wheel. Any active drip is a sign that a seal has failed and needs immediate attention.
This check isn’t just about finding problems; it’s about building a baseline. When you check your bike every day, you become intimately familiar with how it’s supposed to look, feel, and sound. You’ll notice a slightly loose chain or a new drip of oil long before it becomes a major issue. This regular, hands-on interaction is the foundation of a good system diagnosis. It turns an abstract machine into a familiar partner.
Your Action Plan: The Final Drive Pre-Ride Check
- Chain: Check for 0.8-1.2 inches of slack by pushing it up and down. Visually inspect for any kinks, rust, or tight spots as you roll the bike.
- Belt: Verify proper tension according to your owner’s manual using a tension gauge. Inspect the belt’s teeth and surface for any fraying, cracking, or embedded debris.
- Shaft: Visually inspect the final drive housing (the “pumpkin” at the rear wheel) and where it meets the swingarm for any signs of oil leaks or fresh grime collecting on seepage.
- Play Test: With the bike in gear, gently try to rock the rear wheel back and forth. Check for any excessive play or clunking in the final drive (for shaft) or at the sprocket carrier (for chain/belt).
- Listen: As you begin your ride, roll the first few feet with the engine off (if safe) or at idle. Listen for any dry squeaking from the chain, unusual vibrations, or grinding noises from the final drive area.
By internalizing this diagnostic approach, you transform from a simple operator into an informed owner. The next logical step is to apply this mindset during your very next pre-ride inspection, turning routine checks into a valuable conversation with your machine.
Frequently Asked Questions About Final Drive Inspection
How do I know if my chain is too loose?
If you can pull the chain away from the rear sprocket more than half a tooth height, it’s too loose and needs adjustment.
What does a worn belt look like?
Look for exposed cords, cracks across the belt width, missing teeth, or a glazed/shiny appearance on the contact surface.
Should I worry about small oil spots under my shaft drive?
Minor seepage or “misting” can be normal on some models, but active dripping or puddles indicate a seal failure that requires immediate attention.