Recurring fork seal leaks are a symptom, not the core problem. The real issue is your stock suspension’s inability to manage the sudden hydraulic pressures from city potholes.
- High-speed damping circuits get overwhelmed, transferring raw impact forces directly to the seals and causing them to fail.
- Small, repeated impacts progressively damage other critical components like steering head bearings, leading to vague steering and unsafe handling.
Recommendation: Proactively tuning your rebound and compression damping, and making informed component choices, is the only way to break the expensive cycle of repairs and build true suspension resilience.
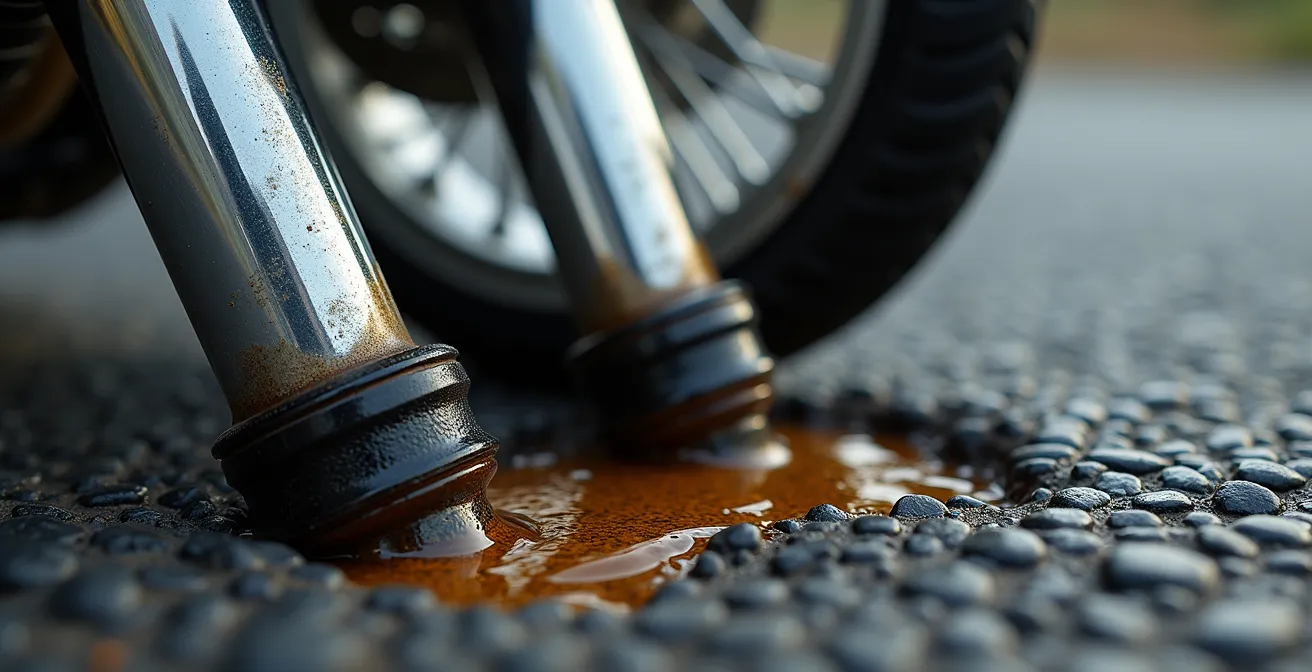
That sickening thud of hitting an unexpected pothole is a feeling every city rider knows well. But the initial jolt is often just the beginning. The real frustration comes a few days later when you spot that dreaded oily ring on your fork stanchion—the tell-tale sign of a leaking fork seal. For many, this kicks off a frustrating and expensive cycle: a trip to the shop, a hefty repair bill, and a few months of smooth riding until the next cratered road inevitably causes the same failure. The common advice to “just avoid potholes” or “get it fixed” feels hollow when navigating the urban jungle is a daily reality.
But what if that leaking seal isn’t the real problem? What if it’s just the final, expensive symptom of a system-wide failure? The truth is, most stock motorcycle suspensions are not set up to handle the violent, high-speed energy spikes of a sharp-edged pothole impact. The oil inside your forks can’t move through the internal valves fast enough, creating a momentary ‘hydraulic lock’ that transmits the full force of the impact directly to the weakest link: the fork seals. This is why they fail repeatedly, no matter how carefully you ride.
This guide goes beyond the repair bill. We’ll dive into the hydraulics and mechanics of your suspension to show you how to turn your bike from a pothole victim into a resilient urban machine. By understanding how to manage impact energy through proper setup—from rebound damping and spring choice to wheel selection—you can stop treating the symptom and finally fix the underlying cause. We’ll explore how to adjust your bike to absorb impacts correctly, why certain components survive better than others, and how surface conditions change the game entirely. It’s time to take control and build a suspension that works for the roads you actually ride on.
This in-depth guide is structured to walk you through every critical aspect of your motorcycle’s suspension system. From fundamental damping adjustments to advanced component choices, you will find actionable advice to enhance both comfort and durability. The following sections will provide the knowledge you need to diagnose issues and make informed upgrades.
Summary: A Comprehensive Guide to Pothole-Proofing Your Motorcycle Suspension
- How to Set Rebound Damping So Your Bike Doesn’t Pogo After Bumps?
- Spoked vs Cast Wheels: Which Survives Potholes Better?
- How Progressive Springs Reduce Jolt on Sharp Road Edges?
- The “Clunk” When Braking: Is Your Steering Head Loose from Road Impacts?
- Do You Need a Steering Damper for Street Riding on Rough Roads?
- Straightening vs Replacing: When Is a Bent Aluminum Rim Safe to Repair?
- How to Soften Your Roadster Suspension for Rough City Streets?
- Asphalt vs Concrete: How Surface Composition Changes Your Stopping Distance in the Rain?
How to Set Rebound Damping So Your Bike Doesn’t Pogo After Bumps?
Rebound damping is arguably the most critical and misunderstood suspension setting for street riding. It controls the speed at which your suspension extends back to its full length after being compressed by a bump. Getting this wrong is a direct cause of poor handling on rough roads. If rebound is too slow, the suspension can’t recover in time for the next bump in a series, causing it to “pack down” and become progressively harsher and more rigid. If it’s too fast, the bike will feel like a pogo stick, oscillating after an impact and upsetting the chassis. This loss of tire contact is where control is lost.
The goal is to set the rebound fast enough to track the road surface but slow enough to maintain stability. A good rule of thumb is that the suspension should return to its original position in about one second after a firm push. For city riding littered with potholes, this setting is crucial. The high-speed damping circuits are what specifically manage the sudden, sharp velocities generated by hitting a pothole, and proper rebound ensures the system is ready to handle that event without losing composure. As suspension experts at UTI point out, it is this high-speed behavior that differentiates a well-tuned street setup from a track-focused one.
An incorrectly set rebound leads to a harsh ride and, more dangerously, a loss of traction when the wheel bounces off the pavement instead of following it. For a city rider, this means less braking grip, less cornering stability, and a bike that feels nervous and unpredictable over the very imperfections you encounter most often. Properly setting your rebound is the first, and most important, step in transforming your bike’s ability to handle the real world.
Spoked vs Cast Wheels: Which Survives Potholes Better?
When a motorcycle encounters a pothole, the wheel is the first component to absorb the impact. The type of wheel you have—spoked or cast—dramatically changes how that impact energy is managed. It’s a critical choice that directly affects both ride quality and the likelihood of expensive damage. The fundamental difference lies in how they handle stress: spoked wheels are designed for compliance, while cast wheels are built for rigidity.
A spoked wheel acts as a system of tension and compression. When it hits a sharp edge, the individual spokes flex, the rim can deform slightly, and the entire structure works to dissipate the impact energy across dozens of points. This inherent compliance means it’s less likely to suffer catastrophic failure. More often, a hard impact will result in a bent rim or a few broken spokes, which are typically repairable. In contrast, a cast aluminum wheel is a single, rigid piece. It transfers impact energy directly and unforgivingly to the tire and suspension. While strong under normal loads, a sharp, localized impact from a pothole can exceed its structural limit, leading to bends or, more dangerously, cracks that render the wheel unsafe and irreparable.
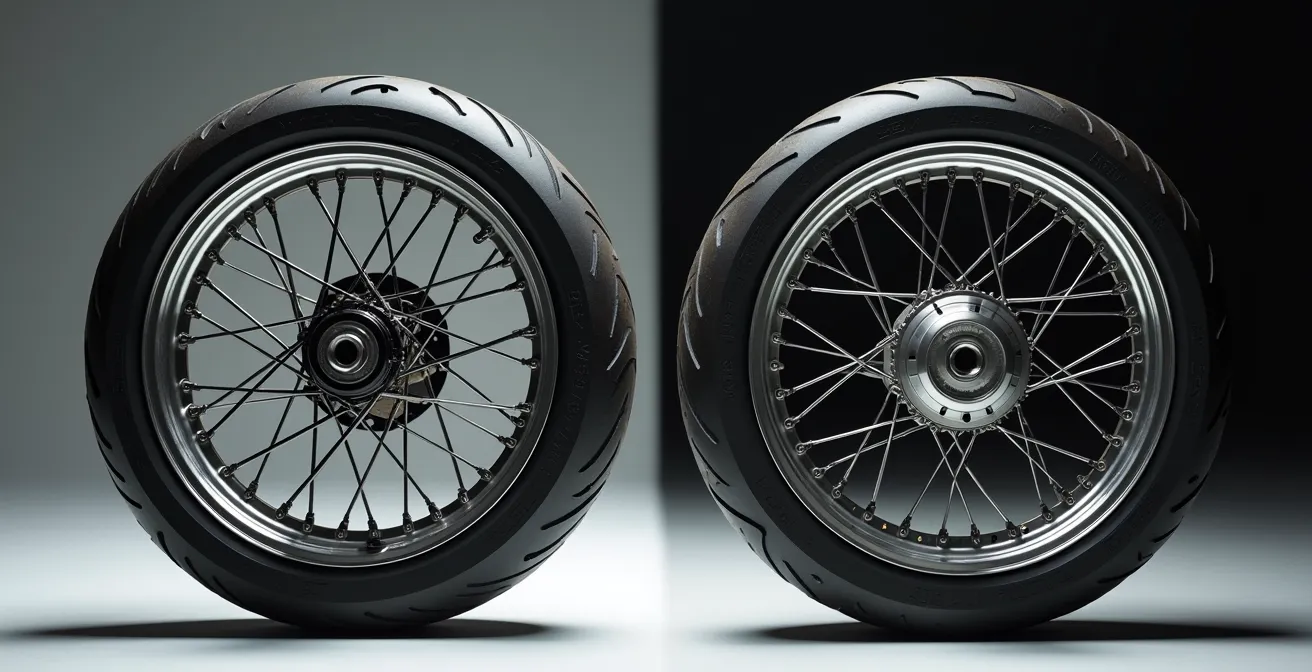
Data from professional repair shops underscores this difference. For instance, spoked wheels often have a 90% successful repair rate after pothole impacts, compared to just 60% for cast wheels, many of which are written off due to fractures. The lighter unsprung weight of many spoked wheel setups also allows the suspension to react more quickly to bumps, further improving compliance on rough surfaces.
This comparative table breaks down the key differences when facing road hazards:
| Factor | Spoked Wheels | Cast Wheels |
|---|---|---|
| Impact Absorption | Spokes flex and dissipate energy through tension/compression | Rigid structure transfers impact directly to suspension |
| Typical Repair Cost | $85-$200 for rim straightening or spoke replacement | $85-$200 for minor bends, replacement often needed for cracks |
| Failure Mode | Individual spokes break or rim bends (repairable) | Catastrophic cracks possible (non-repairable) |
| Unsprung Weight | Lighter – better suspension response over rough roads | Heavier – more inertia causing wheel ‘chatter’ over bumps |
How Progressive Springs Reduce Jolt on Sharp Road Edges?
The springs in your forks and rear shocks are the heart of your suspension, responsible for supporting the weight of you and your bike and absorbing road imperfections. Standard, or “linear,” springs have a single, constant rate of compression. This is a compromise; they can be too soft for large impacts, leading to bottoming out, or too stiff for small bumps, resulting in a harsh ride. Progressive springs offer a more sophisticated solution tailored for the variable demands of real-world streets.
A progressive spring is designed with variable-pitch coils. The coils that are spaced further apart are softer and compress easily, while the coils wound more tightly together are firmer. This design creates a dual-rate effect. Over small, chattery bumps, the softer part of the spring absorbs the imperfections, providing a compliant and comfortable ride. When you hit a large, sharp-edged pothole, the initial impact is absorbed by the soft section, but as the fork compresses further, the firmer coils engage to prevent the suspension from bottoming out. This ‘ramping up’ of stiffness is what reduces the violent jolt that would otherwise be transmitted to the chassis and rider.
As demonstrated by Progressive Suspension’s testing, this design offers a ‘plush’ initial travel for comfort while retaining enough firmness to handle major hits. This is the ideal characteristic for a city bike that must deal with everything from cracked pavement to deep potholes. For riders on a budget, it’s even possible to simulate this effect without replacing the springs. By carefully increasing the fork oil level, you reduce the internal air volume. This trapped air acts as a natural “air spring,” becoming progressively firmer as the fork compresses, mimicking the action of a true progressive spring and providing enhanced bottoming resistance.
The “Clunk” When Braking: Is Your Steering Head Loose from Road Impacts?
If you’ve noticed a distinct ‘clunk’ from the front end under braking or when going over bumps, your first thought might be the forks. However, the culprit is often the steering head bearings. These crucial components allow your front end to pivot smoothly, but they take a tremendous beating from road impacts, especially potholes. Repeated hits don’t just compress the forks vertically; they also translate into powerful fore-and-aft forces that hammer the bearings.
As one expert explains, the physics of the impact are unforgiving. This insight from the GearJunkie Powersports Editor highlights how vertical forces are transformed into damaging horizontal ones:
Potholes translate vertical impacts through the fork’s rake angle into powerful fore-and-aft forces that hammer steering head bearings, causing accelerated wear and loosening
– GearJunkie Powersports Editor, GearJunkie Motorcycle Suspension Guide
This constant hammering can cause two problems: the bearing races can become notched or “detented,” creating a spot where the steering wants to “stick,” or the bearings can simply come loose in their housing. A loose steering head creates a vague, disconnected feeling in the handlebars and is a significant safety issue. It allows for play in the front end, which can lead to instability and unpredictable handling, especially under braking or during direction changes. A worn or loose steering head is a direct consequence of the suspension failing to adequately absorb road shocks before they reach the chassis.
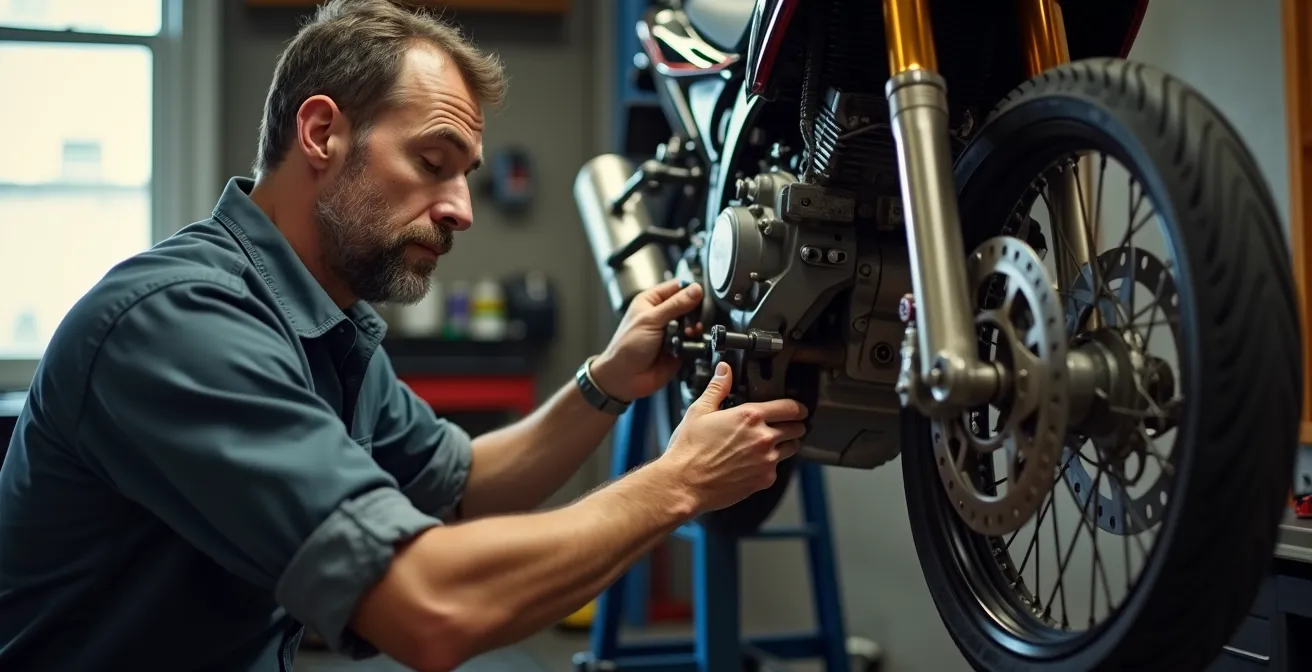
Fortunately, diagnosing the issue is straightforward and can be done at home. Identifying whether your bearings are worn or just loose is the first step toward restoring your bike’s sharp handling and safety.
Your Action Plan: Two-Step Steering Head Bearing Diagnostic Test
- Test for Wear: Safely lift the front wheel off the ground. Slowly and lightly turn the handlebars from lock to lock. Feel for any ‘notch’ or sticking point, especially at the straight-ahead position. This indicates damage to the bearing races, which requires replacement.
- Test for Looseness: With the front wheel still elevated, firmly grab the bottom of the fork sliders. Try to push and pull them forward and backward. Have a helper watch the area where the triple clamp meets the frame’s head tube. Any visible movement or a ‘clunk’ sound means the bearings are loose.
- Corrective Action (If Loose): If the bearings are simply loose, they can often be re-torqued to the manufacturer’s specification (typically 15-25 ft-lbs). This simple adjustment can completely eliminate the clunking and restore precise steering.
- Corrective Action (If Worn): If you felt a notch in Step 1, the bearings and their races must be replaced. The repeated impacts have deformed the metal surfaces.
- Preventive Maintenance: To prevent premature failure, re-grease your steering head bearings every 10,000 miles, or more frequently if you regularly ride on poor-quality roads. This keeps the bearings lubricated and cushioned against impacts.
Do You Need a Steering Damper for Street Riding on Rough Roads?
A steering damper, or stabilizer, is a hydraulic shock absorber for your handlebars. Its purpose is to quell any unwanted, rapid back-and-forth movement, commonly known as a “tank slapper” or headshake. While often associated with high-speed track riding, a damper can be a valuable tool for street riders navigating rough, pothole-ridden roads. A sharp impact to one side of the front wheel can initiate a violent oscillation, and a damper is the only device designed specifically to control it.
The need for a damper on the street is a subject of debate, but its value becomes clear when you consider the forces involved. A pothole doesn’t just create a vertical jolt; it can also be an asymmetrical impact that twists the handlebars. A damper adds a layer of hydraulic resistance, slowing down these sudden, uncontrolled movements without affecting normal, deliberate steering inputs. This can be the difference between a scary-but-controlled moment and a full-blown tank slapper. Furthermore, by calming the front end, a damper can help prevent the kind of violent jolts that lead to costly repairs, which can average between $150 and $400 for a fork seal replacement, not to mention significant shop wait times.
The choice often comes down to manual versus electronic dampers. Manual dampers are simpler and less expensive, but a setting that’s firm enough for high-speed stability on a rough road might feel heavy and cumbersome during low-speed maneuvers like parking. Electronic dampers offer the best of both worlds by automatically adjusting the damping force based on the bike’s speed, providing firm control when needed and remaining virtually transparent at city speeds.
Case Study: Electronic vs. Manual Dampers for Rough UK Roads
A 2025 analysis by Bikesure on the UK’s notoriously pockmarked roads revealed a clear advantage for electronic dampers. Riders reported that manual dampers, when set firm enough to handle unexpected potholes and prevent headshake at motorway speeds, made slow-speed filtering and parking feel sluggish. In contrast, electronic systems automatically reduced damping at low speeds, preserving agility, while instantly firming up to provide stability during high-speed encounters with road imperfections. The conclusion was that for riders frequently facing a mix of slow city traffic and rough, high-speed roads, electronic dampers provided a significant safety and comfort benefit, justifying their higher cost.
Straightening vs Replacing: When Is a Bent Aluminum Rim Safe to Repair?
Hitting a pothole with a cast aluminum wheel can often result in a bent rim. The immediate question for any rider is whether the wheel can be safely repaired or if it requires a costly replacement. The answer depends entirely on the type and severity of the damage. While professional wheel straightening services can work wonders, there are absolute safety lines that should never be crossed.
The most critical factor is the presence of cracks. Any visible crack, no matter how small, means the wheel is unsafe and must be replaced immediately. The heat and pressure used in the straightening process can worsen a crack, and even if it’s welded, the structural integrity of the aluminum is compromised, creating a massive risk of catastrophic failure on the road. The second factor is the location of the bend. A lateral bend, which causes a side-to-side wobble, is generally easier and safer to repair. A radial bend, which creates a “hop” or a flat spot in the wheel’s rotation, is more problematic as it involves more stretching and compressing of the metal, leading to fatigue.
Repairing a bent rim is a job for specialists with the right equipment to heat, press, and measure the wheel back to tolerance. Attempting a DIY repair is extremely dangerous. A reputable shop will be able to assess the damage and advise on the safest course of action. Generally, minor to moderate bends without any cracking are considered repairable, but the cost of the repair should be weighed against the peace of mind that comes with a brand-new, structurally perfect wheel.
The following guide, based on industry best practices, can help you assess the viability of a repair:
| Damage Type | Repairable? | Safety Rating | Typical Cost |
|---|---|---|---|
| Lateral Bend (wobble) | Yes – easier to repair | Good if properly straightened | $85-$200 |
| Radial Bend (hop/flat spot) | Sometimes – higher risk | Moderate – metal fatigue likely | $150-$300 |
| Any Visible Crack | Never – immediate replacement | Unsafe – catastrophic failure risk | New wheel required |
| Work-hardened Area | Not recommended | Poor – brittle failure point | New wheel safer option |
How to Soften Your Roadster Suspension for Rough City Streets?
Roadsters are often set up from the factory with a firm, “sporty” suspension tune that prioritizes sharp handling on smooth roads. This same setup can feel punishingly harsh on the cracked, uneven pavement of a typical city. Softening your suspension is not about creating a wallowy, vague ride; it’s about increasing suspension compliance—the ability of the wheels to follow the road’s contours without transmitting every jolt to you. A more compliant suspension provides better traction, more comfort, and ultimately, more control in an urban environment.
The core principle, as recommended by suspension specialists for city riding, is to soften the compression damping while potentially increasing rebound damping slightly. Softer compression allows the wheel to move upward more easily when it encounters a sharp bump, absorbing the impact instead of transferring it. A slight increase in rebound is then needed to control the spring’s return force and prevent a “pogo stick” effect after the bump. This balance is key to a plush yet controlled ride.
There is a clear roadmap to achieving this, with options available for every budget. You can start with simple, free adjustments and progress to more significant hardware changes if needed. The most important free adjustment is setting your rider sag correctly (typically 30-35mm), as this ensures your suspension is operating in the most effective part of its travel. From there, you can explore changes to damping, fork oil, and eventually springs to create a setup perfectly tailored to your weight and riding environment.
Here is a roadmap from budget-friendly tweaks to premium upgrades:
- FREE: Start by setting your rider sag. Aim for 30-35mm of sag, front and rear. This is the single most effective adjustment you can make.
- FREE: Back off (soften) the compression damping clickers on your forks and shock by 2-3 clicks from the standard setting.
- FREE: Experiment by reducing tire pressure in 2 PSI increments, ensuring you stay within the manufacturer’s safe operating range. This can significantly improve comfort.
- $$: Change to a lighter viscosity fork oil (e.g., from 15W to 10W). This allows oil to flow more easily through the damping circuits, resulting in a softer feel.
- $$$: Install progressive-rate fork springs that are matched to your specific rider weight. This is one of the most effective upgrades for a comfortable yet controlled ride.
- $$$$: For the ultimate setup, a full suspension rebuild with custom valving by a specialist will tailor the damping characteristics precisely to your needs and local road conditions.
Key Takeaways
- Fork seal failure is primarily a hydraulic issue caused by damping that’s too slow for sharp impacts, not just a result of the impact itself.
- Proactively tuning rebound and compression damping for compliance is the most effective and lowest-cost defense against pothole damage.
- Component choices matter: spoked wheels and progressive springs are inherently more resilient to the sharp, high-energy impacts of city riding.
Asphalt vs Concrete: How Surface Composition Changes Your Stopping Distance in the Rain?
A well-tuned suspension isn’t just about comfort; it’s a critical safety system, especially in the rain. Your ability to stop or corner in wet conditions is entirely dependent on the tire maintaining contact with the road surface. However, not all wet surfaces are created equal. The difference between asphalt and concrete can be dramatic, and it’s your suspension’s job to manage that difference.
The key factor is porosity. Modern porous asphalt is designed to allow water to drain away from the surface, through tiny voids in the material. This helps the tire’s tread to cut through the remaining water film and make direct mechanical contact with the grippy asphalt itself. In contrast, many concrete surfaces, especially older ones that have been polished smooth by traffic, are non-porous. Water sits on top, creating a perfect film for hydroplaning. On this kind of surface, your tire is effectively riding on a layer of water, not pavement, drastically increasing your stopping distance.

This is where suspension compliance becomes a matter of life and death. As UK testing has shown, a wheel that ‘chatters’ or bounces over small irregularities on wet concrete loses all available traction with each bounce. A compliant suspension, one that is soft enough to allow the wheel to follow every contour, is essential for maintaining the constant pressure needed to push water out of the way and keep the tire in contact with the ground. On a shiny, wet concrete road, a stiff, track-focused suspension can be dangerously skittish, while a softer, more compliant setup provides a crucial safety margin.
Being able to visually assess the road ahead and understand the implications for traction is a vital rider skill. A shiny, reflective surface is a clear warning sign of a water film and reduced grip, demanding smoother inputs and a more cautious approach. A dull, dark surface indicates better drainage and more available traction.
Now that you understand the forces at play and how each component contributes to a resilient ride, the next logical step is to perform a baseline check of your own suspension. Start by evaluating and adjusting your rebound and sag settings to build a solid foundation for a safer, more comfortable, and ultimately less expensive urban riding experience.